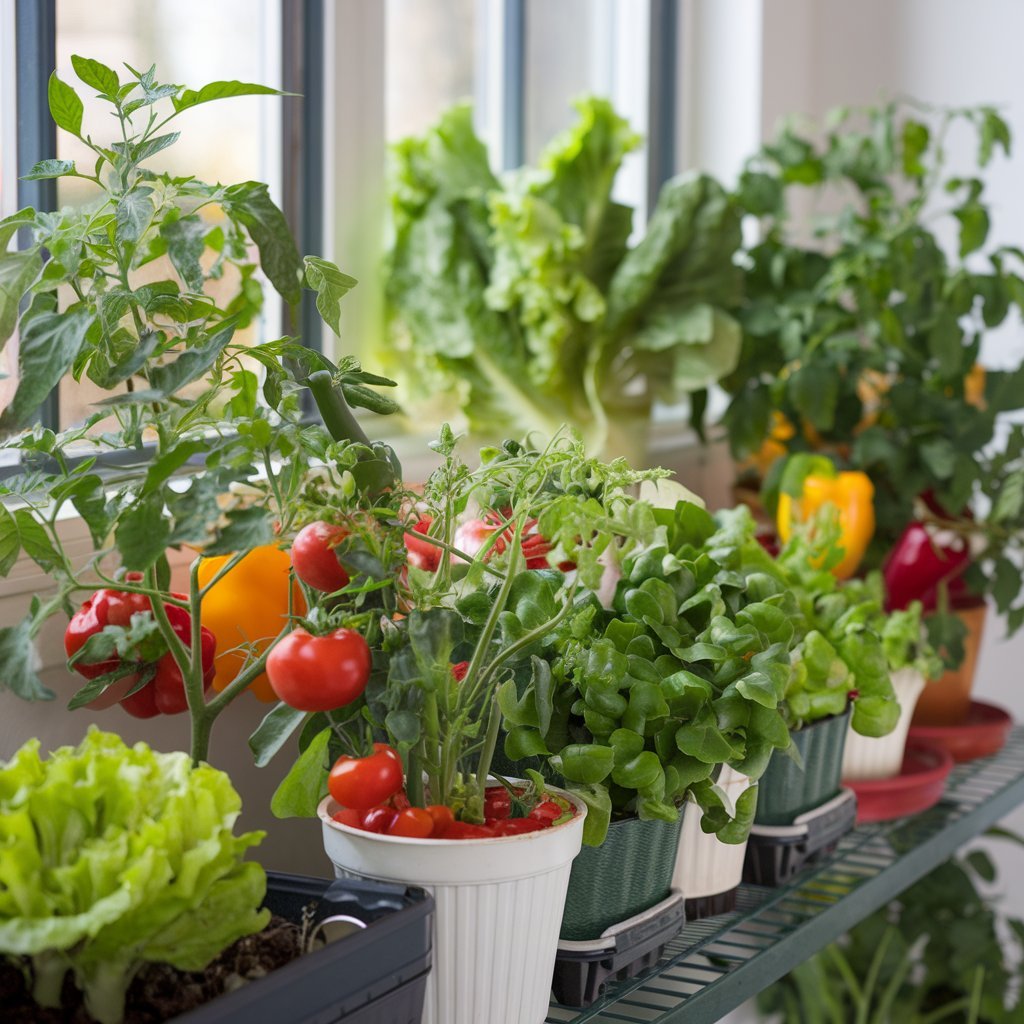
In an age where convenience meets consciousness growing your own vegetables has become more than just a trend it’s a movement.Whether you’re working with a sprawling backyard or a modest apartment balcony cultivating fresh produce at home is not only possible it’s incredibly rewarding.Even better some vegetable grow so quicly you can start enjoying your harvest in as little as 30 days.
This guide will walk you through five fast growing vegetable perfect for beginner gardener apartment dwellers and anyone eager to enjoy homegrown food with minimal waiting. Let’s dive into the garden of quick win.
Why Fast Growing Vegetable?
Fast-growing vegetables are a dream for new gardener or those with busy schedule. Here are a few reason why they should be your go to choice:
* Quick Results: Motivation comes easy when you see fast progress.
* Perfect for Succession Planting: Harvest one plant another—maximize space and yields.
* Great for Kids: Short growth cycles are perfect for keeping children engaged.
* Season Flexibility: Enjoy multiple planting cycles in spring,summer and fall.
With these benefit in mind let’s explore the five superstar veggies that promise a speedy harvest.
1. Radishes: Crunchy,Spicy and Ready in 25 Days
Why Grow Radishes?
Radishes are one of the quickest growing vegetable often ready to harvest in just 20 to 25 days. Their sharp peppery flavor add zing to salad and sandwiche.
Growing Tip:
* Soil: Loose well-drained soil
* Sunlight: Full sun to partial shade
* Watering: Keep soil consistently moist
* Container-Friendly: Yes shallow pots work well
Harvesting Tip: Once they reach about an inch in diameter they’re ready to pull.Leaving them in the ground too long can make them woody or bitter.
Popular Varieties: Cherry Belle French Breakfast White Icicle
2. Arugula: Peppery Leaves in Just 20 Days
Why Grow Arugula?
If you love flavorful greens arugula is a must.It mature in as little as 20 days and thrives in cooler weather.
Growing Tip:
* Soil: Nutrient-rich and well-drained
* Sunlight: Partial shade is ideal
* Watering: Keep it evenly moist
* Container Friendly: Absolutel a shallow tray is sufficient
Harvesting Tip: Pick individual leaves when they’re 2-3 inches long or harvest the whole plant when it’s about 6 inches tall.
Popular Varieties: Astro, Rocket, Slow Bolt
3. Lettuce: Crisp Refreshing and Harvestable in 28 Days
Why Grow Lettuce?
Lettuce is one of the easiest and most rewarding leafy green to grow.It germinate quickly and grow well in small container.
Growing Tip:
* Soil: Loose moist and rich in organic matter
* Sunlight: Partial shade or morning sun
* Watering: Keep it evenly moist
* Container Friendly: Yes even window boxe work
Harvesting Tip: Use the “cut and come again” method to keep your lettuce producing for week.
Popular Varieties: Buttercrunch Salad Bowl Romaine
4. Spinach: Nutrient-Rich and Ready in 30 Days
Why Grow Spinach?
Spinach is a cool weather crop packed with nutrient like iron,calcium and vitamins A and C. It grow quickly and is great for smoothies sautés and salad.
Growing Tip:
* Soil: Fertile and well-drained
* Sunlight: Partial to full sun
* Watering: Keep soil evenly moist
* Container-Friendly: Yes, but needs depth of at least 6 inches
Harvesting Tip: Harvest young leaves once they’re about 3 inches long for best flavor.
Popular Varieties: Bloomsdale, Baby Leaf Space
5. Green Onions: Regrow from Kitchen Scrap in 21 Days
Why Grow Green Onion?
Also known as scallions green onion are versatile fast growing and incredibly easy to grow from kitchen scrap.
Growing Tip:
* Soil: Moist and well-drained
* Sunlight: Full sun to partial shade
* Watering: Water consistently but avoid soggy soil
* Container-Friendly: Ideal for small jar or pot
Harvesting Tip: Cut the green tops once they reach 6-8 inches tall.They will continue to regrow for multiple harvest.
Popular Varieties: Evergreen Bunching White Lisbon
Getting Started: Tool and Tip for Success
To maximize your success, gather a few basic:
* Quality seed
* Organic potting mix
* Watering can or spray bottle
* Containers with drainage holes
* Label for plant identification
Quick Tips:
* Start with easy wins like radishes and arugula.
* Use companion planting to maximize space and repel pest.
* Monitor daily for water and sunlight needs.
* Don’t forget to fertilize weekly with an organic liquid feed.
Sustainability Bonus: Grow, Harvest, Repeat
Fast growing vegetables aren’t just convenient they’re also eco-friendly.Growing your own food reduce reliance on packaged green and cut down on grocery trip and carbon footprint.
Try succession planting. As soon as you harvest one crop plant another in its place.This ensure a continuous supply of fresh produce throughout the season.
Your Garden Your Rules
The joy of gardening lies not only in the harvest but in the journey.These five fast growing vegetable are the perfect way to start. They require minimal effort deliver result quickly and invite you into a lifestyle that’s sustainable, healthy, and deeply satisfying.
Start small. Pick your favorite from the list and plant today.You’ll be surprised how just a few minutes a day in the garden can nourish your body mind and soul.
🌿 Frequently Asked Questions About Fast-Growing Vegetables
🌱 What are the quickest vegetables I can grow at home?
Radishes, arugula, lettuce, spinach, and green onions are some of the fastest-growing vegetables. Most are harvest-ready in just 20–30 days, making them perfect for beginners and busy growers alike.
🪴 Can I grow these veggies in containers or small spaces?
Absolutely! These veggies do great in pots, planters, grow bags, and even upcycled containers. Just make sure they have drainage and get enough sunlight each day.
☀️ How much sunlight do these fast growers need?
Most of these vegetables thrive with 4–6 hours of sunlight daily. Leafy greens like spinach and lettuce can handle some shade, while root veggies like radishes prefer full sun.
🌼 Should I use fertilizer to get quicker harvests?
Yes! A gentle organic fertilizer or well-rotted compost will give your plants the nutrients they need to grow fast and strong. Avoid too much nitrogen though — especially for root crops.
📅 When’s the best time to plant these veggies?
Spring and fall are the best times for most fast-growing vegetables. They love cooler temperatures and will grow better when it’s not too hot. In mild climates, you can grow them year-round!
✂️ Can I harvest these vegetables without killing the plant?
Yes! For leafy greens, just snip off the outer leaves and let the center continue growing — it’s called “cut and come again.” For root crops, pull the whole plant, but you can regrow green onions and more from scraps in water or soil.
One of the many places to find refuge gardens were always a personal sanctuary of beauty. Imagine if your garden could be useful as well as just looking pleasing?
What if instead it could nourish you too? Edimental gardening is the intersection of edible and ornamental and the place where the eyes get a feast & the garden provides the fresh harvests.
As it becomes more popular you get a space that’s not only beautiful to look at but also one that’s useful one that helps your landscaping needs and attends to another need of ours–that for food. Even with a vast garden or a tiny urban balcony edimental gardening can make your green space into a sustainable, beautiful paradise. In this article we’ll explore what essential are to creating an edimental garden from selecting the right plants to designing a landscape that features beauty and bounty.You’ll learn to design a garden that delights your senses, nourishes your diet and is friendly to the environment while maintaining a sense of thoughtful user focused design from start to finish.
Why Edimental Gardening?
Before we continue along with the practical aspects of edimental gardening, let us talk a bit about why edimental gardening is gaining good popularity.The past couple of years have been all about blending function with aesthetics in your outdoor spaces—more than ever.
Here’s why this approach is taking off: Sustainability and Self Sufficient. Many have taken inspiration from this global movement toward sustainable living and decided to grow their own food. Edimental gardening means growing fresh vegetables without giving away the pretty and of course edible garden.Integrating native, pollinator friendly plants reduces your carbon footprint cuts down on grocery store trips and even supports local ecosystems. Maximizing Small Spaces In urban areas space is expensive. Many edible plants also serve as ornamental and by edimental gardening, the proliferation of a few plants makes the most of small plots or balcony space. With clever design you can get a productive space efficient garden. A Feast for the Senses More than just your sense of sight edimental gardens engage.What they bring to your outdoor space are enticing scents from herbs and fruit vibrant colors and texture from flowers and vegetable and a full gamut of textures from the smoothness of leafy greens to the firm grip of climbing vines. Plus the pleasure of harvesting your own food really makes for a new sensory layer of gardening. Connection with Nature If you grow your own food that connection with the land is deeper.The act of tending towards plants which feed you can lead to a fulfilling and reciprocal relationship with nature that will serve you in a way that makes you a bit more mindful.
Designing Your Edimental Garden
After we understand the draw of edimental gardening let’s get down to discussing how to actually build one.No matter whether you are just beginning or incorporate edible elements in an existing garden it boils down to creating balance of beauty and usefulness.
Assessing Your Space Your first step is to evaluate the layout of your garden.Think about how much sun and shade the different parts of the garden get during the day and how much water each part of the garden gets. All of these factors will play into which plants you choose, as some like tomatoes and peppers need full sun, while other’s such as leafy greens and herbs can do just fine in partial shade.If you understand your space both ornamental and edible plants will thrive under the right conditions. Pro Tip: If you’re short on space or have trouble reaching the tops of plants vertical gardening and container planting are great choices.Trellises arches and hanging baskets let you grow up — as opposed to out while providing structure and beauty to your design.
Choosing Edible-Ornamental Plants
Your plant selection is the heart of edimental gardening.Consider the plants that not only look nice but are edible as well. This category is composed of many fruits vegetables and herbs.Here a list of popular edimental plants to get you started: Kale: Kale has eye appeal, with curly textured leaves in a variety of colours from deep green to purple.It’s a nutrient powerhouse too. Swiss Chard: Swiss chard is a standout in any garden with vibrant stalks in reds yellows and pinks.Both edible and decorative, its leaves. Lavender: Lavender is known for its calming scent, and adds a purple delicate decorative touch to your garden as well as can be used in teas sweets and savory dishes. Artichokes: These tall plants have beautiful thistle like flower but eatable bud. Borage: These herb plant produce beautiful blue flower that are edible and taste like cucumber and are great for adding to salad or garnishe on drink. Nasturtiums: The blossoms and leaves are both edible delivering a peppery flavor and these vibrant easy to grow flowers come in many colour. Thyme and Oregano: Ground cover delicate blooms and flavorful additions to many dishes these low growing herbs are a favorite of adding extra (delicious) colour to the ground. Benefits of aesthetic value and practical uses in large numbers combine to make them an ideal building block for an edimental garden.
Creating Visual Balance
Visual balance is key just like it is in traditional landscaping in any kind of edimental gardening. You want to have a garden that feels balanced with no plant feeling out place. As you think about color texture and height when designing your space you can create layers of interest.
Use Contrasting Colors: Pair colorful elements with muted and softer items to add visual interest. They are excited to pair purple kale with the golden of marigolds or bright red tomato. Play with Heights: Let taller plants like sunflowers artichokes, or climbing beans form a backdrop and use shorter herbs and leafy greens to ploke up the foreground. Add Texture: Lettuce leaves are smooth; fennel fronds spiky; lamb’s ear velvety, snap peas crisp — all can be combined. Gardeners who mix and match textures and colors among their plants will blend the two together, a thoughtful remake of the urban landscape, while providing fresh, delicious food.
Maintaining an Edimental Garden
When you establish your edimental garden it’s important to care for it.Luckily many edibles are low maintenance but a little attention can make a big difference keeping your garden productive and beautiful. Soil Health All gardens start with healthy soil. Apply organic compost to improve soil fertility and structure. Most edible plants require nutrient rich soil for good harvests and success so regular soil amendments are essential for a successful year. Pro Tip: You might try mulching with things like straw or grass clippings which will retain moisture suppress weeds and add to the soil as the mulch breaks down. Pest Management
With you growing food, you don’t want to have harsh chemicals. An integrated pest management (IPM) is a great way to keep your garden healthy.If you can’t handle aphids use natural pest deterrents such as companion planting or beneficial insect introduction like ladybugs for aphids. Companion Planting: Ornamental in the form of marigolds helps discourage pests naturally. Marigolds, for example that you plant along with your tomatoes help keep harmful insects away. Regular Harvesting If you’re growing an edimental garden, make sure to harvest your edibles as the season progresses! Not only does it give you fresh produce for your meals but it keeps encouraging plants to produce! For instance trimming basil oregano and mint regularly will hasten their return even more strongly. Pro Tip: In addition, pruning prevents some of the other side effects and helps your garden remain neat and well maintained.
Bringing Edimental Gardening Indoors
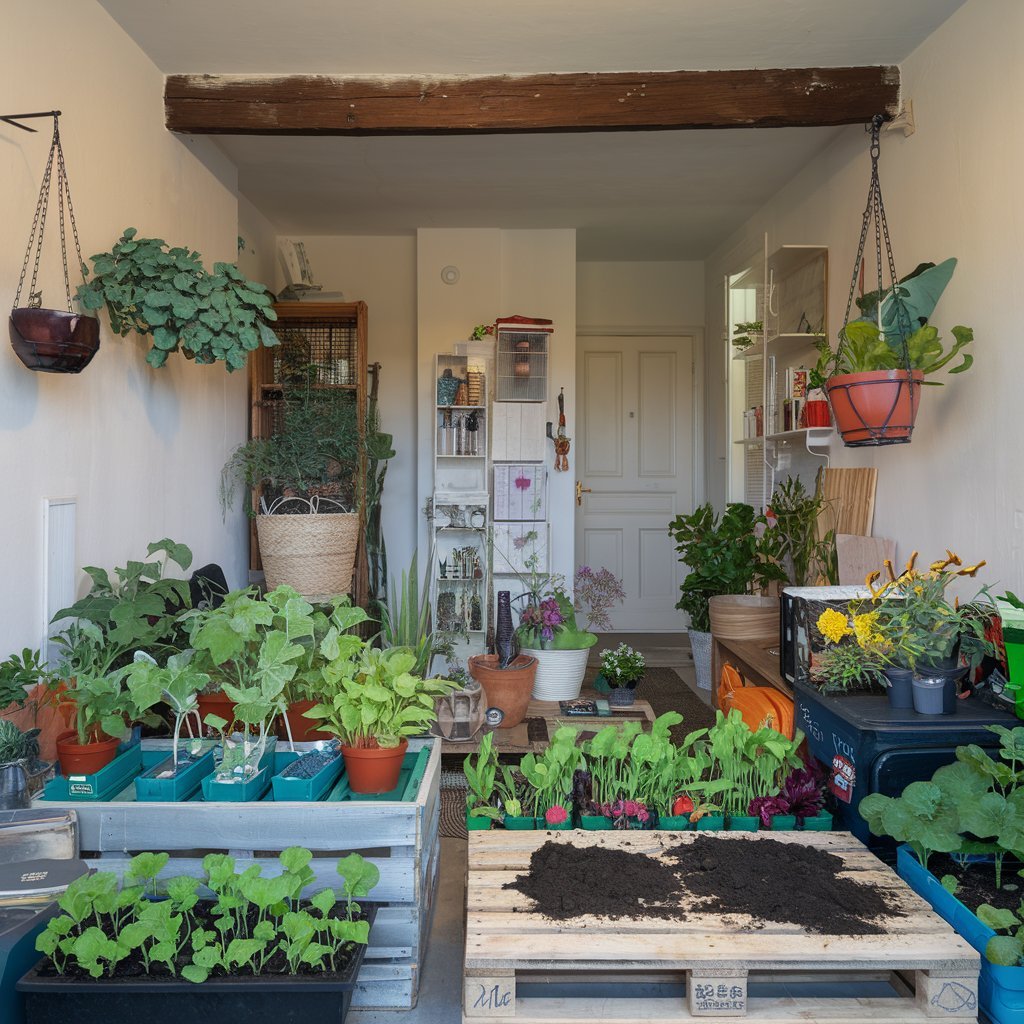
And what if you don’t have outdoor space but you want to try edimental gardening? No problem! Container gardening is one way you can bring the concept indoors.Pot are great for small herbs like basil chives and parsley even on a sunny windows ill.Dwarf varieties of vegetables like tomatoes and pepper can also be grown in pots and these will bring greenery and fresh produce to your home. Indoor edimental gardening also means you can enjoy fresh ingredient year round for home cook who want to take their cooking to the next level with fresh herbs and veggies growing in their own backyard.
Creating a true Oasis in Your Garden Edimental gardening isn’t a trend, it’s a philosophy, one that joins gardening art with the reality of producing your own food and brings a sense of serenity to each venture. If you integrate edible plants into your landscape, you are not only beautifying your space, but creating a space that’s sustainable functional and fulfilling.Whether your land is acres a balcony edimental gardening principles can work for you. It’s time to take action now. Get up and start planning your garden. Go and visit nurseries and find the perfect plants to put in your space creating a lush edible oasis from plain dirt.It’s a discovery journey while gardening, so try varying colors plants layouts.Along with the fun you’ll enjoy the fruit of fresh home grown produce that raises the quality of your life and your surroundings. FAQs About Edimental Gardening
What is an Edimental Garden?
An edimental garden is a garden where edible and ornamental plant grow together to make a space that is beautiful as well as functional. It’s a mash of the aesthetic and practical where plants not only look pretty but they also give you fresh homegrown food.
Edimental: So What Are They and How Do You Grow Them?
Edimentals are ornamentals as well as edible plants. They look good, and food or herbs are afforded. Grow them by selecting plants that will do well in your area proper soil and sunshine conditions and mixing them with other decorative plants for a calm look.
Gardens: The Essentials of ‘Edimental’ Gardening
Edimental gardening is the selection of plants that are both ornamental and edible, a design plan that makes sense both aesthetically and functionally, and keeping your garden watered, pest free, and harvested. Instead concentrate on selecting the plants that will serve the dual purpose while meeting your local climate.
What are Edimental Plants?
Edimental plants are plants that have two purposes and are edible and visually appealing. Lavender, nasturtiums, kale, Swiss chard, and artichokes are examples. Turn your garden beautiful at the same time as getting some fresh produce.
Edimental Gardening: How to Design an Edimental Garden
An edimental garden is about balancing beauty with function. Think of sunlight, soil, and water availability when you start by looking at your space. Make your selection of plants that are aesthetically appealing and provide useful edible benefits. An eye catching design can be created using layers of height and texture, espousing vertical elements such as trellises or arches if space is limited.
What are the benefits of an Edimental garden?
It’s fresh homegrown and you get a visually appealing space.
It provides sustainability by reducing purchasing store bought produce.
The edimental gardening supports local wildlife and pollinators.
This makes us satisfied and feeling connected with nature.
What Plants Will Be Best in an Edimental Garden?
Kale: Beautiful colorful curly leaves that are very nutritious.
Lavender: A pleasant aroma with lovely purple flowers great for teas and baked goods.
Swiss Chard: Varieties with vibrant stalks in many colors perfect for adding colour to your garden.
Borage: Edible blue flower with a cucumber like flavor.
Nasturtiums: Easy to grow colorful flower that are peppery when added to salads.
What Edimentals Books Resources Can I Find?
Books and resources on edimental gardening are many. A good source of information about edible ornamentals include books such as ‘Around the World in 80 Plant’ by Stephen Barstow. If you can’t find these books in your local bookstore you can access them online.
Is UK Popular for Edimental Gardening?
Edimental gardening does exist in the UK and it is growing in popularity because it sees gardens as space to be leveraged for sustainability and maximising space in smaller gardens. But many UK gardeners are turning to growing their own food this way with a beautiful design for their outdoor space being mended.
🌱 History of Edimental Gardening:
Growing a Garden That’s Both Beautiful and Edible Edimental gardening — a blend of “edible” and “ornamental” — is not a completely new idea even though the word “edimental” itself is relatively modern For centuries people around the world have been creating gardens that are both practical and beautiful
🌿 Ancient Times: Where It All Began Ancient civilizations like the Egyptians Greeks and Romans did not separate food gardens from beautiful gardens
In Roman villas wealthy citizens grew herbs fruits vegetables and flowers together for both pleasure and food
Medieval monastery gardens often combined medicinal herbs vegetables and ornamental flowers in small enclosed gardens — the earliest examples of practical yet beautiful garden design
🌸 The Renaissance: Beauty and Food Together During the Renaissance 14th–17th centuries European gardens became more formal but herb and kitchen gardens remained popular
Wealthy estates had potagers French for kitchen gardens — which were laid out in beautiful geometric patterns combining colorful cabbages lettuces herbs and edible flowers
🌻 The 18th–19th Century: The Decorative Movement The rise of ornamental gardening in Europe especially England shifted attention toward flowers lawns and decorative landscapes
Food gardens became separate “working” spaces hidden from view
However in rural areas cottage gardens — filled with fruits vegetables and flowers — kept the edimental spirit alive blending beauty and function naturally
🌾 The 20th Century: Functional Beauty Returns Two world wars led to the Victory Gardens movement — practical home gardens in cities and suburbs
Although their purpose was primarily food production many Victory Gardens incorporated aesthetic touches flowers mixed with vegetables to attract pollinators and boost morale
🍀 Modern Day: The Rise of Edimental Gardening Stephen Barstow a well known botanist and author of Around the World in 80 Plants helped popularize the term “Edimental” in the early 2000s
His work highlighted plants that are both ornamental and edible encouraging gardeners to rethink how food plants can also enhance garden design
Modern sustainable gardening urban farming and permaculture movements have further fueled the trend
Today many gardeners — from hobbyists to landscape designers — are embracing Edimental Gardening as a way to
Maximize space
Create stunning gardens
Grow fresh healthy food right at home
Support pollinators and wildlife
Edimental gardening is actually a return to ancient and traditional wisdom — where gardens were not just about looking good or feeding the family — they were both Today’s edimental gardens celebrate sustainability beauty and practicality all at once blending the best of the past with the creativity of the future
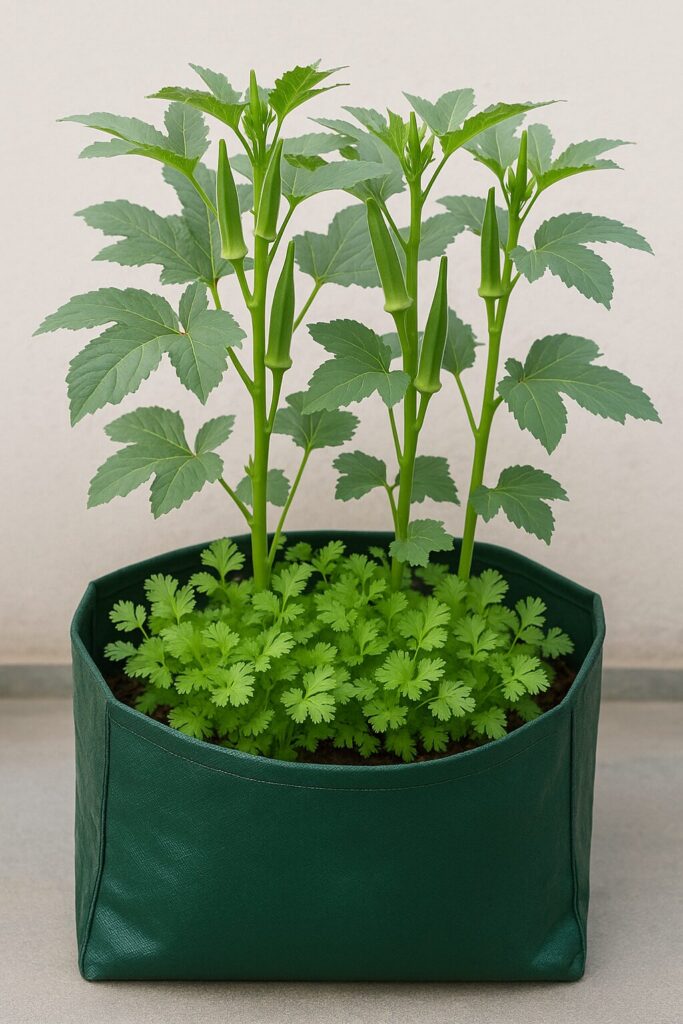
(Bonus: Grow Coriander With It in the Same Grow Bag!)
There’s something incredibly satisfying about growing your own vegetables at home.The fresh flavor the organic quality and the simple joy of harvesting something you’ve nurtured from seed—it’s a rewarding experience every time.And if you’re like me and love okra (also known as ladyfinger or bhindi)then growing it at home is a must.
In this guide I’ll show you exactly how to grow okra from seed in a grow bag and, as a bonus, how to grow coriander (dhania) alongside it.It’s the perfect example of companion planting—a method where one plant benefits another when grown nearby. While okra grows tall, coriander which remains short thrives in the shade below.By the time your okra plants mature your coriander will already be ready for harvest.
So let’s get started!
Why Grow Okra and Coriander Together?
This duo is the perfect match for small-space or balcony gardening.Okra grows upward while coriander sprawls low covering the soil and reducing weed growth.They don’t compete much for sunlight or nutrients making them ideal grow bag partners.
By the time the okra plants begin to need more space and sunlight, the coriander is ready to be harvested—giving you two homegrown vegetables with perfect timing.
What You’ll Need
To grow okra and coriander together here’s what you’ll need:
A grow bag (recommended size: 24-inch diameter, 12-inch depth)
Organic compost (at least 30–50% of total soil volume)
Vermicompost for additional nutrients
Okra seeds (Desi or Hybrid F1 varieties work well)
Coriander seeds (preferably with a high germination rate)
Shower head watering can
Neem cake or green additives (optional but improves soil health)
Markers or tags to label plants and sowing dates
You can find quality seeds and compost at GreenGarden.pk, where many urban gardeners trust the quality and germination rates.
Step-by-Step: Preparing the Soil
Soil quality is crucial for growing healthy vegetables.Okra loves loamy well drained nutrient-rich soil and coriander prefers moisture retaining but soft soil.
Step 1: Refresh Old Soil
If you’re using soil from last year’s grow bag, make sure to remove any old roots or debris. Sift through it if needed to break up clumps.
Step 2: Add Organic Compost
Add 30% organic compost to old soil—or 50% if you’re starting with fresh soil. Mix it thoroughly, especially the top 3 inches where roots and seeds will establish first.
Step 3: Mix in Vermicompost and Premium Organic Mix
Top up the grow bag with a blend of vermicompost and premium compost.
The result? Soft, crumbly soil full of life. And it smells healthy too—exactly what your seeds need!
Soaking the Seeds (Optional but Recommended)
Before sowing soak your okra and coriander seeds overnight in room-temperature water.This helps soften their outer shells and speeds up germination.Skipping this step won’t stop them from growing but you’ll notice a delay of several days as the soil works to naturally break down the seed coats.
In this case, we skipped soaking to show what sowing dry seeds looks like. Just remember: keep the soil consistently moist to avoid any germination issues.
Sowing the Seeds
Now for the fun part—planting!
Step 1: Water the Soil the Night Before
Moisture is key. Watering the night before helps ensure the soil is hydrated without being soggy. It also creates an ideal environment for seeds to wake up and start sprouting.
Step 2: Planting Okra
Okra seeds are fairly large and should be planted about half an inch deep spaced 10 to 12 inches apart.In a 24-inch grow bag, you can plant around 14 seeds.Even if some fail to germinate, you’ll have backups.
Use your fingers to gently press each seed into the soil cover with a light layer and pat it down.
Step 3: Planting Coriander
Coriander seeds are much smaller, so they don’t need to go as deep.Sprinkle them lightly between the okra seeds and around the edges of the grow bag. Cover with a very thin layer of soil—just enough so no seeds are visible.
Tip: Birds love coriander seeds so don’t leave them exposed or you’ll lose your crop before it even starts!
Watering and Moisture Management
The one mistake new gardeners make is inconsistent watering.Here’s the key rule: keep the soil evenly moist but not waterlogged.A shower head watering can is ideal for this as it distributes water gently and evenly.
Too much water will rot seeds.Too little water and they’ll think it’s not safe to grow.Strike a balance and you’ll see healthy sprouts in a few days.
Ideal Temperature and Timing
March is a great time to plant okra and coriander in most regions.As long as night temperatures don’t drop below 10°C seeds should germinate well.Check your local weather forecast before sowing.
In our case we planted on March 8, and conditions were ideal. Within 7–10 days you’ll start to see life!
Using Plant Tags
Here’s a simple trick to make your garden smarter: cut your seed packet attach it to a stick and label it with the date of sowing or your name.This helps you track germination timelines and see which seeds perform best over time.
Harvest Timeline
Coriander: Ready for harvest in 3 to 4 weeks after planting. You can snip leaves as needed or harvest the entire plant.
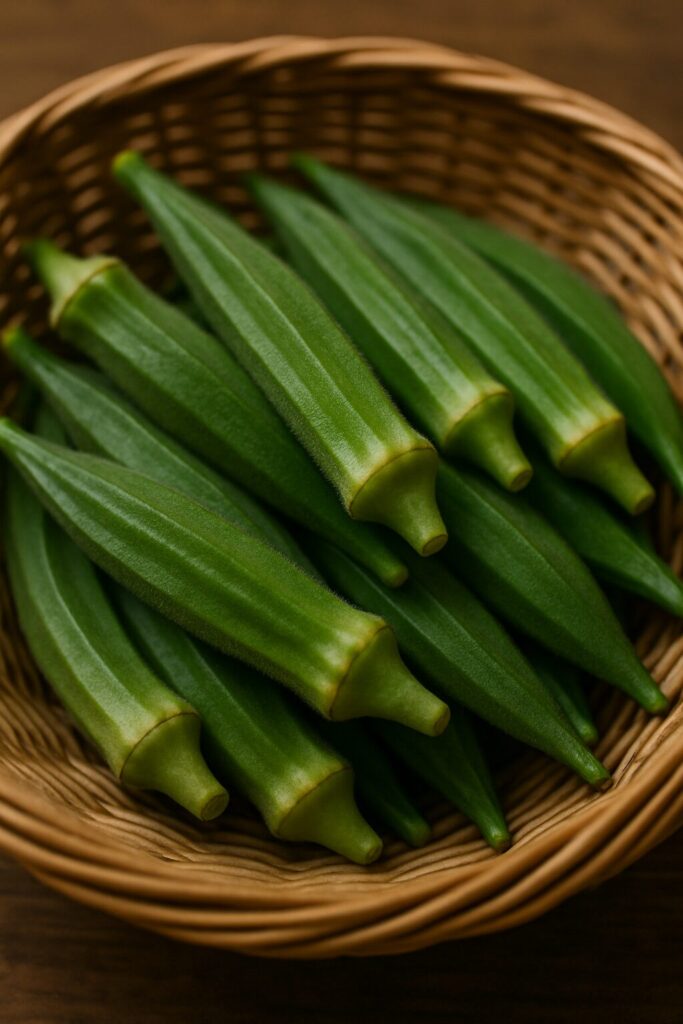
Okra: Begins fruiting in about 45–60 days. Harvest when the pods are 3 to 4 inches long—before they get too tough.
Harvest regularly to encourage the plant to keep producing!
Common Issues and How to Avoid Them
No germination? Check watering levels. Dry patches or soaked areas can delay or stop sprouting.
Yellowing leaves? This could be poor soil drainage or overwatering.
Pests? Neem oil spray works wonders and is safe for edible plants.
Final Thoughts: Why Homegrown Is Best
The taste the texture the health benefits—homegrown vegetables just hit different. No chemicals, no preservatives—just clean water clean soil and your own two hands.It’s fresher safer and frankly more fun than anything you can buy in a store.
Growing okra and coriander together is not just a smart space-saving technique—it’s a simple way to double your harvest and your happiness.Whether you’re gardening on a balcony patio or backyard, this method works beautifully.
FAQs – How to Grow Okra (Ladyfinger) and Coriander in Grow Bags at Home
🌱 How to grow okra (ladyfinger) at home in grow bags?
You can easily grow okra in a 24-inch wide and 12-inch deep grow bag. Use rich, loamy soil mixed with compost, water consistently, and place the bag in a sunny spot. Okra is great for small-space or balcony gardening.
🌿 Can I grow coriander and okra together in one grow bag?
Yes! Growing coriander with okra is an excellent example of companion planting. Coriander stays low and matures quickly, while okra grows tall and slow, so they work really well together without competing.
🗓️ What is the best time to plant okra and coriander at home?
The ideal time is early spring, especially during March, when temperatures stay above 10°C at night. Warm, consistent weather helps both seeds germinate successfully.
💧 Should I soak okra and coriander seeds before planting?
Soaking seeds overnight in room-temperature water can speed up germination. It’s not essential, but it does help get things going faster.
📏 How deep should I plant okra and coriander seeds in containers?
Plant okra seeds about ½ inch deep and space them 10–12 inches apart. Coriander seeds can be lightly sprinkled on the surface and gently covered with a thin layer of soil.
🚿 How often should I water potted okra and coriander plants?
Keep the soil evenly moist but not waterlogged. A gentle shower from a watering can helps avoid disturbing the seeds. Consistency is key to healthy sprouts.
🌾 What is the best soil mix for growing okra and coriander in containers?
Use a mix of loamy soil with 30–50% organic compost and some vermicompost. This blend provides the right balance of drainage and nutrients for both plants.
⏳ How long does it take to harvest coriander and okra at home?
Coriander is ready for harvest in about 3–4 weeks. Okra takes 45–60 days to start producing. Harvest okra pods when they’re 3–4 inches long to keep them tender.
🐛 What are common problems in homegrown okra and coriander plants?
💧 No sprouts? It might be due to dry or soggy soil.
🍂 Yellowing leaves? Usually caused by poor drainage or overwatering.
🦟 Pests? A neem oil spray works well and is safe for edible plants.
♻️ Can I reuse soil in grow bags for the next season?
Definitely. Just remove any old roots, loosen the soil, and mix in fresh compost or vermicompost. You can also add natural soil conditioners like neem cake to improve quality.
🛒 Where can I buy seeds and compost for container gardening?
You can find seeds and compost at local nurseries or online gardening stores. Look for high-germination seeds and organic compost blends for best results.
🏡 Why should I grow vegetables like okra and coriander at home?
Homegrown veggies are fresher, chemical-free, and taste way better than store-bought. Plus, it’s a satisfying hobby that connects you with nature and your food.
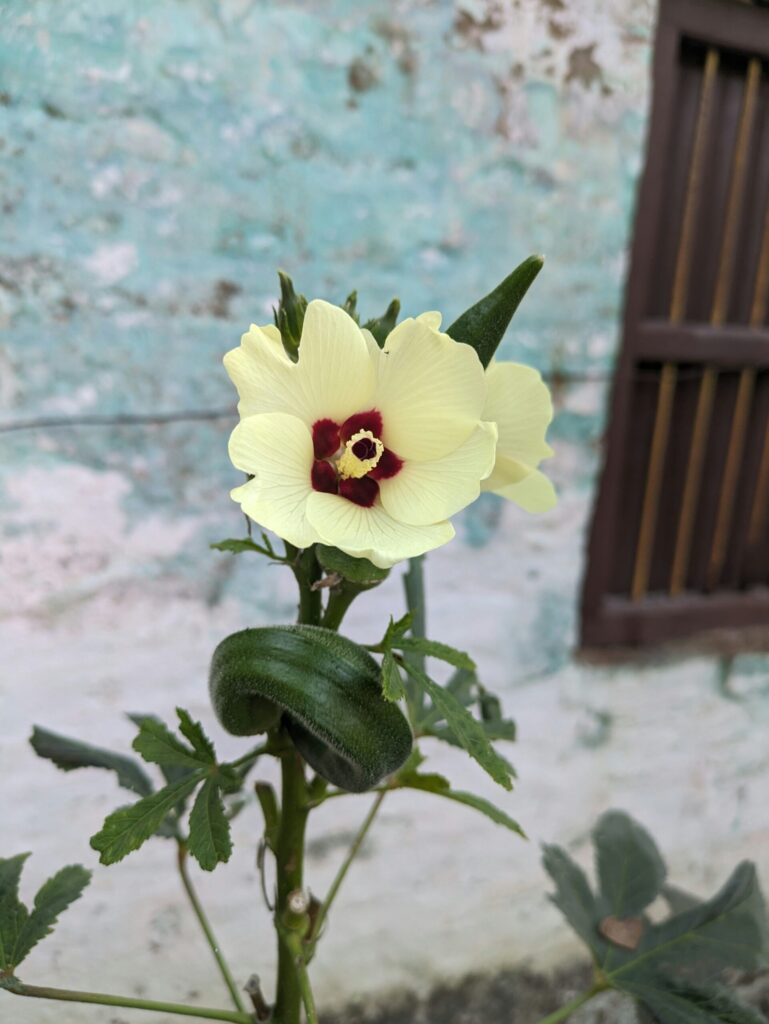
A Brief History of Okra
Okra often called ladyfinger has roots that stretch back thousands of years.Most historians agree it first grew in the fertile lands of Ethiopia and Sudan long before it spread across the world. Ancient Egyptians were among the first to cultivate it loving its tender pods and unique texture.
From Africa okra traveled along ancient trade routes into the Middle East and the Mediterranean.By the 12th century it had found a second home in India, blending beautifully into local cuisines. Thanks to its tolerance for heat and drought, okra thrived wherever it was planted.
Okra made its way to the Americas during the dark era of the transatlantic slave trade. Enslaved Africans carried okra seeds across the ocean, planting them in the unfamiliar soils of the southern United States.Over time okra became a cornerstone of Southern cooking especially in famous dishes like gumbo—a word rooted in African languages.
Today whether it’s stewed fried, or added fresh to a salad okra remains a favorite in kitchens around the world.Its journey through history isn’t just about farming it’s a story of resilience tradition and flavor passed down through generations.
Medical Benefits of Okra (Ladyfinger)
When it comes to health benefit okra is truly a hidden gem.This humble vegetable is packed with soluble fiber making it great for digestion and helping to stabilize blood sugar levels over time. Thanks to its rich antioxidant content okra also plays a role in protecting the heart and keeping cholesterol in check.It’s loaded with vitamin C which gives your immune system a solid boost and supports healthier, more radiant skin. And if you’re watching your weight okra low calories and high fiber help keep you feeling full longer without overdoing it.Its vitamin A and beta-carotene are a blessing for your eyes promoting good vision as you age. Plus, the natural anti-inflammatory compounds in okra offer gentle relief for joint pain and stiffness.Expecting mothers can especially benefit from its folate which supports healthy baby development.One more amazing thing? The sticky, mucilaginous texture of okra actually binds to toxins in the gut helping your body cleanse naturally. With so much packed into such a simple vegetable, okra deserves a lot more love on our plates.
The plant kingdom does not have many plants as recognizable and useful as Aloe Vera. This is one of the oldest and most recognizable gigantous spiky green succulents that have been adorning homes and being used for their usefulness for centuries. If you want to beautify your home with a plant or if you want to get the health benefits of the plant I would recommend Aloe Vera. By being naturally beautiful as well as serving as functional and low maintenance, it’s easy to see why Aloe Vera is highly recommended by and sought by both the amateur or beginner plant collector as well as experienced plant collector. So, let me welcome you all to this article where I will be explaining the care instructions, uses and even some history concerning to the magical plant – Aloe Vera. By the end of this article, you will be ready to take action, either by growing your first Aloe Vera plant, applying gel for natural remedies, or learning about the plant as the ‘medicine of the future’.
The Origins of Aloe Vera: A Plant Steeped in History
Even though Aloe Vera has made its way from ancient civilization to modern day houses, their growth is nothing short of amazing. An arid-region native, this hardy succulent has spread to the far corners of the world, adapting to various climates, and planted in the millions of households. And the Egyptians called it the ‘plant of immortality’, they used it for beauty treatments and embalming practices. It’s also featured in traditional Chinese medicine, Indian Ayurveda and Greek herbal practices. Aloe Vera is a plant known today as being celebrated for its healing properties, its resilience, and today can be found in homes, gardens — and even commercial products. However, decades of history behind it doesn’t mean that Aloe Vera is secondary, especially when it comes to crafting natural solutions for common health and skincare problems.
Benefits of Aloe Vera: More Than Just a Pretty Plant
Think there is something special about Aloe Vera? In addition to its ability to adapt well to harsh conditions, Aloe Vera is rich in so many benefits that range from the benefit you’ve known, to the benefit you didn’t know; both are very good for you. Let’s explore how Aloe Vera can enhance your well-being and home environment:
1. Natural Skin Care and Healing Properties
Of course Aloe Vera is famous for its gel which is a clear sticky substance present inside Aloe Vera’s leaves.Use of this gel has been common for centuries to ease burns,cuts and other skin irritations.Aloe Vera is famous for its anti-inflammatory and antibacterial properties which makes it the go to natural first aid treatment. Sunburn Relief: Aloe Vera gel is known to calm down any sunburn you have suffered.It’s hydrating properties help reduce redness ease inflammation and promote faster skin recovery. Moisturizing: Aloe Vera gel is unlike most commercial moisturizers as it is free of harsh chemicals. It is a popular choice for sensitive prone skinned people as it is very hydrating and does not clog pores. Wound Healing: It is really good to help with minor cuts and abrasions as well most likely by creating a protective layer on top of the skin to protect it and at the same time delivering the right nutrients to help with tissue regeneration.
2. Boosts Digestive Health
Aloe Vera isn’t just for outside use.It also taken in juice form to take advantage of any digestive health benefits it offers.Aloe Vera juice is said to be packed with vitamins enzymes and amino acids and is said to help with aiding digestion constipation and irritable bowel syndrome (IBS). Detoxification: Aloe Vera can naturally cleanse a person digestive tract of toxin. Anti-Inflammatory: One of the biggest advantage of using this as a natural remedy is that it can reduce inflammation in the gut which can help with condition like acid reflux and other.
3. Air Purification for Your Home
So Aloe Vera doesn’t just serve as a health booster it also an awesome air purifier.Just like many other succulents Aloe Vera helps get rid of toxins such as formaldehyde and benzene in the air.An Aloe Vera plant in your home will allow for cleaner fresher air improving the aesthetic and functional value of your living space.
4. Hair and Scalp Care
Aloe Vera leaves are full of enzymes which help stimulate healthy hair growth and soothe irritated scalp aka dandruff itch.Aloe Vera is ideal for all those with dandruff or dry damaged hair as it can help heal the scalp up and make your hair look healthy and shiny again.
How to Care for Aloe Vera: A Beginner-Friendly Plant
Aloe Vera is so popular because it’s low maintenance.Aloe Vera is the plant for you no matter if you have a green thumb or are just starting out.Follow these simple steps and you’ll have a healthy Aloe Vera thriving in no time:
Light Requirements But Aloe Vera loves bright indirect sunlight.Where to place it If you are growing it indoor put it somewhere near a bright window one that receive approximately 6-8 hours of light per day.It can tolerate some direct sunlight but too much sunlight will make its leaves brown or dry out. Watering Aloe Vera is a drought tolerant plant therefore does not require frequent watering.In many ways overwatering is the most common way we accidentally make this hardy plant suffer.Aloasar plants should be watered once every 2-3 weeks with the exception of the ground to turn out completely between waterings.During winter months, you can cut back on watering further. Tip: Typically it’s best to water deeply but make sure the soil is dry enough that the roots can breathe. The last thing you want is to let the plant sit in standing water this causes root rot. Soil and Potting Aloe Vera grows best in well draining soil.For example use a succulent or cactus potting mix or mix your own by adding sand or perlite to regular potting soil.When choosing a pot important is also it should be chosen with drainage holes to avoid the flooding by adding water. Temperature Aloe Vera does well in the temperature range of 55°F to 80°F (13°C to 27°C).Aloe Vera is not frost tolerant so if you live in a colder climate it best to keep your Aloe Vera indoors during the winter month. Fertilizing Although this Aloe Vera is fairly easy to grow you can help it along with a little fertilizer during its active growing period (spring and summer) by using half strength of a complete water soluble fertilizer.
Aloe Vera in Your Home: Practical and Aesthetic Uses
Not only is Aloe Vera good for your health, but it makes a beautiful decorative element in homes and gardens.Because of its unique, sculptural form, it is a favorite in contemporary interiors yet its hardy nature means it is equally home on an outdoor site.Here are some creative ways to incorporate Aloe Vera into your home décor: Indoor Plant Styling: Perfect for minimalist modern or rustic spaces Aloe Vera looks great. Put it in a decorative pot on a windowsill desk or coffee table if you want a little greenery in your room. Outdoor Garden Feature: Aloe Vera is an easy plant to put out in the garden bed and can be a striking low maintenance landscape feature in warmer climates.Any garden will look better with its rosette shape. DIY Projects: In homemade beauty products such as a homemade facial mask or homemade lotion you can use Aloe Vera or you can create a DIY aloe vera gel recipe and keep it in your first aid kit.
Growing Aloe Vera Indoors vs. Outdoors: What You Need to Know
The care instructions are pretty much the same, whether that’s in your aloe Vera indoors or aloe Vera outdoors.However there are a few differences to consider: Indoor Aloe Vera Care: Light: Aloe Vera can be kept indoors and should be placed in a sunny spot but with indirect light for example on a windowsill. Potting: To avoid root rot make sure your indoor Aloe Vera is sitting in a pot with drainage holes. Outdoor Aloe Vera Care: Climate: Aloe Vera grows nice and cold hardy where I live (zone 5) and can be planted directly in the ground if you live a warm, dry climate (USDA zones 8-11).Plant it in a place where soil is well drained, as a plant that doesn’t like soggy soil. Frost Protection: If your place is in the cold area, take your Aloe Vera indoors at the time of winter or keep your Aloe Vera that might get damaged from the frost cover.
Taking Action: Bringing Aloe Vera Into Your Life
How about you try the amazing Aloe Vera for yourself? It’s a perfect plant to choose whether you want to add some natural beauty to your home explore its healing properties or whether you’re looking for a resilient and low maintenance plant.Using the care tips above you should be able to lean a healthy Aloe Vera plant that will serve you well for many years to come. Plant an Aloe Vera in your home or garden today and do it small, because you’ll soon become addicted to its daily uses.Aloe Vera is a timeless companion and not only as a “miracle plant” for your hair weaves and skin but also as a flow of nature that helps improve both your environment and your domestic well-being from air purification, to skincare.
Conclusion: Aloe Vera’s Unique Appeal
Aloe Vera is not just another house plant it is a symbol for nature resilience and versatility. With a rich history and so many uses it’s one of the best plant you can own.Aloe Vera is definitely an alluring plant either for its looks or for its great health benefits.So why wait? Act now and bring Aloe Vera into your home there nothing you’ll miss out on!
FAQs About Aloe Vera
1. What are the benefits of Aloe Vera?
Aloe Vera offers numerous benefits including soothing burns and skin irritations promoting digestive health moisturizing the skin aiding wound healing and purifying the air.It also contains vitamins antioxidants and anti-inflammatory compounds that enhance overall wellness.
2. What is Aloe Vera used for?
Used for variety of things including to tone skin treat minor burns and cuts reduce inflammation improve digestion hydrate hair and scalp as well as air purification.It’s also regularly consumed as juice to help promote gut health.
3. What are the 10 uses of Aloe Vera?
Here are ten popular uses of Aloe Vera:
Sunburn relief
Moisturizing dry skin
Treating acne and blemishes
Minor cuts and abrasions can be healed.
Irritated scalp, hair growth.
How juice is good for digestive health..
Detoxifying the body
Decreasing inflammation of the bones and muscles
Air purification in homes
Making use of DIY skincare and also beauty products
4. Does Aloe Vera clean the stomach?
Yes, Aloe Vera juice is known to help cleanse the digestive tract by promoting detoxification and supporting the removal of waste.It can soothe the stomach lining and may help alleviate symptom of acid reflux constipation and other digestive discomfort.
5. What is Aloe Vera Gel?
Inside the plant’s leaves is the clear, jelly like substance called Aloe Vera gel. Vitamins, enzymes, amino acids, and anti-inflammatory compounds make it powerful for healthy skin and also for use as a key ingredient in homemade beauty products.
6. List of diseases cured by Aloe Vera
Aloe Vera can’t cure diseases however it is known to reduce symptoms and help treat several conditions.It has been used to help with:
Psoriasis and eczema
Acne
Oral health problems(for example gum disease)
Digestive disorder (e.g IBS and constipation)
Minor burns and skin wounds
Sunburns
Arthritis inflammation
Use of Aloe Vera as a treatment should always be upon the advice of a healthcare professional.
7. What is Aloe Vera juice?
The inner gel of the plant’s leaves is made into Aloe Vera juice. It is taken for its anticipated health benefits including helping digestion, hydrating, and boosting antioxidants. Aloe Vera juice is drunk by many people as a natural remedy for constipation, or to settle an irritated stomach.
8. What are the benefits of Aloe Vera juice?
Aloe Vera juice provides several benefit including:
Improving digestion
Relieving constipation
Detoxifying the body
Reducing inflammation in the gut
Hydrating the body
Supporting immune function
9. Does Aloe Vera kill viruses?
Aloe Vera has antiviral compounds that could help in the suppression of some viruses, but doesn’t cure viral infections. Although Aloe Vera used to fight herpes has not been proved to be effective against viruses, some studies have suggested a modest effect on the herpes simplex virus.
10. What are Aloe Vera’s medicinal uses?
They have used Aloe Vera in traditional as in modern medicine due to its anti-inflammatory, antibacterial and antioxidant properties.Medicinally it is used to treat minor burn cuts and wounds, soothe irritated skin relieve digestive problems and promote oral health by reducing the inflammation of the gums.
11. What is the scientific name of Aloe Vera?
Aloe barbadensis miller is the scientific name for Aloe Vera.The plant belong to the Asphodelaceae family and is commonly called a succulent plant.
Quick Facts: Scientific Name: Aloe barbadensis miller Uses: Soothes burns treat skin condition promote hair growth improve digestion Benefits: Moisturizes skin reduces inflammation helps with wound healing detoxifies the body
At present, thanks to the growing awareness of environmental problems and changes in the climate, people who are creating terraced gardens and landscapes for their homes are interested in the subject of designing landscape and garden space that is as useful and environmentally friendly as possible. This is where sustainable landscaping comes in. This practice is concerned with principles of conservation in designing and managing landscapes of gardens and other outdoor environments. Sustainable landscaping goes beyond simply incorporating its practices into the popular trends that are around us; it also means embracing and agreeing to establish functional and sustainable environment grounds for people and living organisms. Both a homeowner wanting to redo the backyard or a landscape company wanting to present options that are more sustainable, it is a useful approach to design gardens that are stunning and which are sustainable at the same time with the natural environment. In this article, I am going to dissect the concept and key foundational elements of sustainable landscaping, provide you with tangible guidelines on how to make this transition, and show why doing it is not only the best thing you can do for the planet but also the best thing you can do for yourself. Save for the end, you will receive all the necessary knowledge and inspiration for making you garden more sustainable and environmentally friendly.
What Is Sustainable Landscaping?
Sustainable landscaping is a garden and landscape design method that seeks to minimize environmental effect while greatest possible increase the attraction and steadiness of outdoor spaces. The idea is to produce landscapes that are consistent with nature, in the sense of removing cars or structures that are dampening the landscape and reducing the need to use lots of extra water, chemicals, or energy. At its core, sustainable landscaping involves the following practices: Smart irrigation water conservation techniques and planting drought tolerant species as planting options. Planting native plants to support biodiversity by attracting other beneficial wildlife, such as pollinators. Composting, and reducing waste by using organic fertilizers. Designing landscapes that consume less energy over time – less to build, less to maintain. The idea is that a natural garden with demand and the use of fewer resources, leaving a good effect on the environment. Tips in Sustainable landscaping can help you beautify your outdoor space without causing any harm to surrounding ecosystems.
Why Choose Sustainable Landscaping?
Environmental Benefits Positive effect of sustainable landscaping on the environment is one of the most obvious reasons to choose sustainable landscaping.Traditional landscaping leads to high water use requires chemical fertilizers and pesticides that can be bad for the soil and disturbance to local wildlife.With the lack of resources available in land filled with undesirable features sustainable landscaping focuses on reducing these negative effects by promoting the practice of natural environments that promote the health of the environment. Bysaving water and reducing use of chemicals you are contributing to healthier ecosystems. This fights climate change curbs pollution and helps local wildlife. They’re also more resilient to drought and extreme weather and are better able to thrive in a changing climate making them sustainable gardens. Cost-Effective Sustainable landscaping can also be a money saving venture.The higher up front investment on sustainable practices may seem greater however the reduction in water and fertilizer needs, and the decrease in times needing maintenance saves over time. For example, planting drought resistant species will in turn reduce your bills for water. Composting and mulching can also help to reduce the need for high cost chemical fertilizers. Moreover sustainable gardens need less mowing and trimming which means you will spend less time and labor taking care of the garden.This can really make a difference over the years. Healthier Lifestyle Research has actually shown that gardening and spending time in nature are good for both your mental and physical health.This sustainable landscaping goes one step further and eliminates spaces with harmful chemicals which makes for a healthier environment for you and your family.All of these help contribute to overall well being breathing clean air eating food from your organic garden enjoying the peaceful natural setting of a sustainable landscape.
Key Principles of Sustainable Landscaping
Water Conservation Water is one of the most precious, out of which regions easily faced with drought and water shortage. The sustainable landscaping focuses mainly on cut down of water utilisation using techniques like drip irrigation, rainwater harvesting and choosing drought tolerant plants.In arid regions, xeriscaping, a landscaping method which uses little or no water, are popular too. The water waste is controlled by drip irrigation systems that deliver water directly to the roots of plant. Rainwater collecting or rainwater harvesting systems can take rainwater in (and during rain) and store it for later use, becoming a free source of water for your garden. Conservation of water can also be done by mulching.By retaining moisture in the soil it also helps reduce the amount of frequent watering soil needs and also promotes better soil health! Soil Health A sustainable garden is only possible with healthy soil. Compost and organic fertilizers are ways to promote soil health naturally one.It does more than reduce waste and recycle organic materials it delivers valuable nutrients in the process that help plants thrive. Use synthetic fertilizers and pesticides sparingly, as they can cause soil to degrade over long periods.Natural pest control methods such as introducing beneficial insects (ladybugs and predatory beetles) that help control harmful pests but don’t harm the ecosystem instead. Another technique is cover cropping planting particular crops that protect the soil and help block erosion during the off season.They can be tilled back into the soil to help it structure and also enrich in nutrients.
Planting Native Species Sustainable landscaping is built from the ground up with native plants.That’s one of the reasons they have evolved to thrive in the local climate and soil conditions they don’t need as much water, fertilizer or maintenance as non native species. Also, native plants offer food and a space for local wildlife to live creating biodiversity within the garden. Lavender sunflowers and milkweed are all pollinator friendly plants that will attract bees, butterflies and other beneficial insects important to pollinating our crops and flowers.When you plant a variety of native species you are helping to make a thriving ecosystem in your garden. Reducing Energy Use Mowing the traditional lawn or the utilization of gas powered hand tools, does this sound distracting, but it is a reality in traditional landscaping.Sustainable landscaping emphasizes low-energy solutions such as: With solar powered outdoor lighting. Instead of gas powered ones opting for manual tools. Placing trees to supply natural shade and to minimize cooling costs. In fact a well designed landscape can lower your homes energy use.For instance, adding shade trees on the south or west sides of your house will cut into your summer cooling needs and windbreaks will help out with your winter heating budget.
Minimizing Waste Sustainable landscaping is about reducing waste. Instead of sending plant clippings and yard waste to a landfill you can compost it to make nutrient rich soil amendments.If you mow your lawn you can also achieve this another way which is by grasscycling or leaving grass clippings on the grass after you mow it so that you don’t generate any additional grass waste. One of the best ways to limit waste while working in your garden is to turn to recycled materials in your garden like reclaimed wood to use in raised beds or recycled containers for planters.
Steps to Create a Sustainable Landscape
Sustainable landscape seem impossible to create however with the right planning it’s actually doable.Here’s a step-by-step guide to help you get started: Assess Your Site Evaluate your garden first before making changes.Factors to consider include soil quality, sunlight and what already exists in that space.It will help you pick the right plants and design elements to work with the space you have. Sustainability in Design Planning your landscape with sustainability in mind is important. Add rainfall gardens (that capture storm water) composting areas and mulching beds.Pick plants suitable to your climate and soil and figure out how to keep maintenance to a minumum while keeping your crown glass gleaming. Choose Water-Wise Plants Go for drought tolerant and native plants that use less water and less labor.Water group plants similarly used together to ensure further use of water with better irrigation measures. Seek to install Smart Irrigation Systems Drip irrigation or smart sprinklers that can be programmed out to water efficiently as needed. Another handy thing rain sensors can be used for is automatically changing watering schedules based on the amount of rain. Mulch and Compost So apply an organic layer of mulch around plants to help hold the moisture reduce the weeds and generally improve the soils.Compost your kitchen scraps and yard waste and become a natural fertilizer for your garden. Keep Your Sustainable Garden However, sustainable gardens are low maintenance gardens but they need regular care.Pay attention to soil health prune whenever necessary and follow seasonal change by adjusting watering.The more you grow your garden the more you will be rewarded with a vibrant self-sufficient ecosystem.
Taking Action: How You Can Make a Difference
Benefits of sustainable landscaping aren’t just for the environment but for long term benefits for homeowners.If you keep water and waste down to a minimum while supporting local ecosystems you’re helping the planet.Second a good sustainable garden is easier to maintain and in the long run less costly. If you’re set on completely overhaul your garden or just implement small changes, every step you take towards making your garden more sustainable really matters.Focus on one or two sustainable practices like composting or planting the native species and gradually add more to that. It’s a rewarding journey to sustainable landscaping for you and to the world around you. A better future is being created garden by garden by adopting these practices.
Final Thoughts: A Greener Future Starts in Your Backyard
Landscaping isn’t just about beautifying your garden.It just means building space that works for you, your community the planet.If you take the right approach, you can create an eco friendly landscape that is visually appealing and not environmentally depleting all at once. There are two ways to jump into it—start small or go all in. So remember however small the sustainable choice you make it’s strong.So why not begin
FAQs About Sustainable Landscaping
FAQs about sustainable landscaping help you get a better understanding of all what it involves to make your outdoor look great in green.
1. What do we mean by sustainable landscape?
Outdoor space designed and maintained to have the least possible impact on nature.This conserves resources water and energy as well as supporting local ecosystems using native plants and cutting waste, pollution and emissions.The intent is to build a beautiful usable space that requires little in the way of upkeep and reflects nature’s processes in a productive way.
2. What is the sustainable landscape approach?
Eco friendly practice of landscape design and maintenance is known as the sustainable landscape approach.This includes: Using native and drought tolerant plants. Article lists implementing water saving techniques such as drip irrigation and rain water harvesting. Organic composting and mulch for soil health enhancement. Both reductions and elimination of chemical fertilizers and pesticides. On the other hand this approach is aimed to achieve balance between human use and environmental health producing landscapes that are both beautiful and resource efficient.
3. What is an eco-landscape?
They are landscapes whose design objectives include the usage of resources in a selective manner, increased conservation, and minimal interference with other ecosystems. Eco-landscapes focus on: Protection of local fauna employing native plant species. Methods such as installing of rain gardens and the permeable pavements in order to control water runoff. Promoting the organic formation of the soils. Reduction of energy consumption and chemical usage. Eco-landscapes are designed to provide natural pleasures without harming this planet, and in fact, are a much sustainable way when it comes to landscaping solutions.
4. What is an environmental landscape?
They are landscapes whose design objectives include the usage of resources in a selective manner, increased conservation, and minimal interference with other ecosystems. Eco-landscapes focus on: Protection of local fauna employing native plant species. Methods such as installing of rain gardens and the permeable pavements in order to control water runoff. Promoting the organic formation of the soils. Reduction of energy consumption and chemical usage. Eco-landscapes are designed to provide natural pleasures without harming this planet, and in fact, are a much sustainable way when it comes to landscaping solutions.
5. What is sustainable landscaping design?
The sustainable landscaping design is to design outside spaces decrease environmental impact and meet human needs. The design process involves: Water Conservation: And rain harvesting, using drought tolerant plants, and efficient irrigation systems. Soil Health: Organic matter; composting that can improve soil quality. Energy Efficiency: Incorporating solar lighting and low maintenance landscapes to use energy when least needed. Biodiversity: Plants that provide support for local wildlife by providing it with the right type of native species. Beauty and functionality exist hand in hand with environmental stewardship in sustainable design.
6. What is sustainable landscape architecture?
The design and planning of outdoor spaces with a focus on environmental health and sustainability is the matter of sustainable landscape architecture. Landscape architects in this field prioritize: Using less (water, energy). Preserving natural habitats. Using green infrastructure, such as rain gardens or permeable surfaces. Plant selection supporting biodiversity. The goal of sustainable landscape architecture is to produce space with both a function and a beauty that is good for the surrounding environment.
7. What jobs are available in sustainable landscaping?
There are numerous career opportunities in sustainable landscaping, including: Landscape Designer/Architect: Works to design sustainable outdoor spaces that conserve as well as promote biodiversity. Horticulturist: It focuses on growing plants in an eco friendly way and promoting plant health. Landscape Maintenance Professional: Offers organic lawn maintenance and water efficient irrigation services. Environmental Consultant: Offers advice to clients on how to minimise the environmental impact of their landscapes. As people and companies want to shrink their environmental footprint, they must turn to these jobs.
8.How can I pursue a degree in Sustainable Landscape Architecture?
Many universities do offer degree programs in sustainable landscape architecture if you’re interested in pursuing a career in that. These programs typically cover: Sustainable design practices. Environmental science, ecology. Urban planning and green infrastructure as an ‘official’ goal within a context of a state and large institutions. Horticulture and plant science. A career with eco friendly sustainable landscape architecture post graduation can become success if you have a degree in sustainable landscape architecture.
History of Sustainable Landscaping
Sustainable landscaping draws heavily on ancient agricultural and land management practices striving to unite peoples work with the earth. As time went by, this concept evolved, especially now that modern ‘landscaping’ practices start to have obvious environmental impact. Sustainable landscaping has a history, contingent upon past movements, technological advancements and rising understanding of ecological impacts.
Ancient Practices and Indigenous Knowledge
Around the world, indigenous cultures, long before the present day environmental movements, practiced methods of sustainable land management. Crop rotation, water conservation and the use of native plants to maintain soil fertility and ecosystem balance were part of these practices. For instance, Native American tribes would burn forest and grassland areas in controlled fires to control growth, and long ago, the Egyptians and Mesopotamians refined irrigation systems which would assist to conserve water, allowing for the growth of agriculture in dry areas.
The Rise of Industrial Landscaping
In the 19th and early 20th centuries as industrialization took off, landscaping began to change dramatically. All this was due to urbanization, increasing demand for ornamental gardens, lawn and parks which often required a very heavy irrigation, chemical fertilisers and pesticides. While aesthetically pleasing, these practices started to drain resources it was meant to affect most: water. Ecosystems were degraded, soil erosion or degradation happened, and all this was precipitated by the excessive use of chemicals and non native plants.
The Environmental Movement of the 1960s and 1970s
Beginning in the early 1960s and 1970s with the environmental movement a modern concept of sustainable landscaping started to come into place.This era was influenced by growing concerns about pollution,deforestation,resource depletion and environmental activism and awareness.Among key publications in moving the public awareness to recognize the threats that pesticides posed to wildlife as well as the wider ecosystems were Rachel Carson’s “Silent Spring” (1962). Aware of these concerns, landscape architects and gardeners started to experiment with ways to design outdoor spaces that would do the least amount of harm to the environment. This was a time when organic gardening practice, composting, and xeriscaping (a kind of landscaping that depends on dry resistant plants to cut down on water requirements) largely developed.
The Birth of Sustainable Landscaping
Sustainable landscaping can be dated back to the beginning of the 1980s and 1990s when the concept of sustainable development became popular.Sustainable landscaping entails the enhancement of values associated with landscape conservation and that enhance the natural resource conservation. This it allows the use of native plants rain water management and storage composting and minimal use of chemical inputs. At the same time various environmental organizations, state agencies and associations of professionals started promoting principles of sustainable landscaping. For instance, the U.S. Green Building Council (USGBC) launched LEED, which consist of guidelines for sustainable landscape design in green building projects.
Technological Advancements and Modern Sustainable Landscaping
In the early 21st century there have been improvements upon newer, more environmentally friendly approaches to the field of landscaping, through technology and awareness. Technologies like those of smart irrigation that enable management of water through underground sensors and other gadgets completed with climatic data and those of pervious pavements that allow rainwater infiltration into the ground have become some of the regularities observed in sustainable landscape design. In addition to this there is what is referred to green infrastructure which is the incorporation of sustainable landscapes in the planning of urban areas for purposes of controlling storm water, combating heat islands and designing wildlife habitats in the built environment. Use of roofs for planting, walls for vegetation, and growing of crops in buildings are now accepted in sustainable design of landscapes in cities.
The Role of Landscape Architects and Environmental Designers
The principles of sustainable landscaping have been realized to a large extent through the input of landscape architects. The leading pioneers and theorists like the Ian McHarg known for his work “Design with Nature” published in 1969 believed that environmental systems should be followed not opposed. Approved by McHarg, generation of landscape architects studied and used the system that makes integrated approach to the surroundings.
Sustainable Landscaping Today
In the current world of climate change, loss of bio-diversity and water scarcity sustainable landscaping remain inevitable for existence. Residents, companies, and local governments are integrating sustainable measures and aiming to build climatically stable territories for human living. Some of the key practices in modern sustainable landscaping include: Xeriscaping: Conserving water by using drought adapted plants and practising minimal use of water on lawns. Rainwater Harvesting: Harvesting and preserving water in case of the occurrence of rainy season for use in irrigation. Native Plantings: Plant selection which has adapted to the local climate and ground conditions to minimizing the use of water, fertilizers and chemicals. Composting: Another is converting organic waste into fertile soil instead of using landfill for organic waste disposal. Green Infrastructure: This designs include addition of bio squares, storm water gardens and weeping ground to help address storm water and minimize its effect. Technical landscapes is not just a trend but a requirement entailing responsibility to manage and develop green area appropriately. They advocate for new environment that is less megalopolis, synthetic and resource cumbersome, but rather; natural, sustainable and rather environmentally friendly.
Conclusion Sustainable landscaping chronology is a transition from early civilizations’ practices in land use right to modern and strategic design. Much as knowledge of environmental issues is ever increasing, sustainable landscaping provide direction to designing aesthetic landscaping that is environmentally sound. When following sustainable design, an individual or community can help improve the well-being of the planet that they are a part of by stabilizing the environment they live in or create landscapes that mimic those who are naturally occuring. Environmental friendly landscaping is a great weapon towards combating increase in the globe temperature and putting a stop to loss of scarce and precious resources in the nature.
Hailed as the perfect solution to any landscape that needs rapidly growing, evergreen shrubs with heights capable of providing privacy, Green Giant Arborvitae (Thuja ‘Green Giant’) is well-renowned for being a low maintenance shrubbery solution that imbues environments with a beautiful green textural tone blessed with year-round appeal. Characteristic of this shrub is establishing a thick and dark green foliage, besides, it is remarkably resistant and thus widely used in gardens, landscapes and fencing. If you require a privacy hedge, concealment of undesirable scenery or perhaps a lovely evergreen then Green Giant Arborvitae suits the bill. This article covers all important information concerning Green Giant Arborvitae that you should be conversant with in this modern world. In this article, you’ll learn about its characteristics, habits, planting and maintenance recommendations, and ways it could benefit your outdoor space. At the end of this guide, you’ll discover why Thuja ‘Green Giant’ is THE go-to- tree for creating privacy screens and hedges as well as for decorative design.
Why Choose Green Giant Arborvitae?
Its popularity for good reason Green Giants have an advantage in that their growth rate is slower than that of other varieties of arborvitae. This species is rather fast-growing, very resistant, and ornamental – something one would not expect from a typical evergreen. Here’s why so many homeowners, landscapers, and gardeners are choosing it: Fast Growth Green Giant Arborvitae is distinguished by rapid growth, which can be 3-5 feet per year, if the plant is grown in the best conditions. This makes it ideal if you need to rush and form a neat privacy hedge or windbreak. Broad plants grow quickly and within the next few years you will be able to have a hedge that will provide you with the barrier and sound insulation. Year-Round Beauty Another critical factor that make Green Giant Arborvitae to be loved by most people is the fact that it is the evergreen tree. Unlike deciduous trees which shed their leaves during winter this ever green tree boasts bright green foliage providing color and beauty when all the other trees are bare. Low Maintenance Green Giant Arborvitae is very low maintenance once it has been planted and has grown into place. Needless to say,it is drought-tolerant,pest-resistant and disease-resistant which will be appealing to any homeowner whose schedule does not permit constant maintenance of the landscape.Your arborvitae hedge will not require a lot of pruning or watering which makes it an ideal hedge plant to cultivate because you will reap the benefits in the future with just a little effort.
Excellent for Privacy and Windbreaks
Because of the tree’s large size and tight foliage, Green Giant Arborvitae is well suited to use as a privacy screen hedge and windbreak.It has a natural growth habit of a pyramid with large branches that limit visibility and filt gusts.A single row of these trees can effectively hide your home and create a personal realm away from neighbor’s spying eyes, loud music and increased wind. Adaptability Another factor why Thuja ‘Green Giant’ is so widely planted is due its tolerance to a wide variety of climate and soils. It has grown best in the USDA hardiness zones of 5-9, which means that it can grow well in both high temperatures of summer and low temperatures of winter. Regardless of the type of soil that you possess whether seashore sandy soil or clayey one or loamy type, Green Giant Arborvitae varieties will perform well in your garden.
Planting Green Giant Arborvitae: Step by Step Guide Follow these steps for a successful planting process. Choose the Right Location Green Giant Arborvitae plants grow accurately in an area that could receive full sunlight to a little shade. For better performance, it should be exposed to at least 6 hours of direct sunlight for it to grow properly.Although it can assimilate some degree of shade plants grown in shaded areas will grow slower and possess sparse foliage.Also choose a sunny location because the land should drain well to avoid root rot. Prepare the Soil It is a naturally growing shrub and does well in different soil types however it prefers freely drained fertile soil.Prepare the planting site by tilling the soil to create a loose structure and adding mulch or compost to increase the plants ability to drain and take up nutrients.If you have heavy clay soil or your soils drains poorly then consider having your arborvitae planted up on a slight slope to direct the water away from the root system.
Dig the Planting Hole The hole for your Green Giant Arborvitae should be approximately twice the width of the spread of the roots you’ve just removed from the root ball and twice as deep as the root ball so you can bury the plant at the identical height at which it was grown in its nursery pot. This helps in ensuring that the roots gain enough space that they require so as to secure themselves on the ground much as the stalks need to gain enough space to support the plant. Spacing When planting hedges or a screen, it is important to space the trees correctly for the same not to become full grown and close together. It is recommended that you introduce certain Green Giant Arborvitae 5 to 6 feet apart to allow growth at an adequate distance while the trees may interlock as they grow habitually. Watering Once you have planted the arborvitae ensure that you water it, this will assist in packing the soil around its root system. Over the first year it is crucial to keep the tree moist, especially if the climate where the tree is planted is dry. After several years, Green Giant Arborvitae is moderately drought resistant but needs supplemental irrigation when it has not rained for weeks.
Care and Maintenance Although Arborvitae does not require much attention to be paid to it while growing, anyway, the following points should be observed so that the plant remains beautiful for years. Watering Of equal concern is the fact that through the first year of growth the soil needs to be kept moist, but not waterlogged. After the tree has been planted the plant will have to be watered only during dry seasons if at all. They require to be watered thoroughly once in a week or in the worst case, two weeks would be enough to make the plant have adequate water. Fertilizing Green Giant has specific arborvitae requirements relating to fertilizing — and that is doing so in the early spring to promote additional height growth for the tree. Water your evergreen hedge; apply a slow release fertilizer for slow feeding of the evergreen hedge, purchase such fertilizer specially recommended for evergreens. In using the product, the use rates chart of the manufacturer should always be followed.
Pruning While Green Giant Arborvitae has a rather compact and pyramidal structure as a species, light pruning also promotes more dense foliage and a better tidiness. This plant needs to be pruned in early spring or in late fall, cutting away all dead, damaged, or crossing branches. Minimal pruning should be done on an arborvitae because they do not grow back in the267 cutting that goes into the older wood. Mulching Spread 2 to 3 inches of much on the ground surrounding the base of the tree to help conserve water, moderate soil temperatures and prevent weeding. The mulch should be kept away from the trunk by a few inches since this may cause rotting. Pest and Disease Management Green Giant Arborvitae has very few problems with pests and diseases, however, they may be experienced occasionally. Be particularly aware of insect pests like bagworms or spider mites on your trees and if found, spray your trees with insecticidal soap water. The fungal diseases like the root rot may be controlled by properly spacing, watering and mulching.
Creative Uses for Green Giant Arborvitae in Landscaping
Different Ways through Which Green Giant Arborvitae Can Be Employed in the Landscape However, apart from being the ultimate screen, Green Giant Arborvitae is ornamental to any yard or landscape design. Here are some creative ways to use this versatile tree: Privacy Screens and Hedges First and foremost Green Giant Arborvitae is most often used for the purpose of a living fence or a hedgerow.Placing a row from these trees may be a good investment along your fence line since it will offer you a privacy hedges with both a view and sound barrier.In case of an open hedge cover the plants indigenously or trim the trees for a bushy look. Windbreaks For people who live in windy areas, the Green Giant Arborvitae serves a good fencing and you will protect your home and garden from strong winds. It has a high growth form and the plant material also grows densely, thereby it provides protection to plants or an annular area against the impact of aggressive winds.
Ornamental Accent Green Giant Arborvitae has dense green foliage and a neat pyramid shape so it becomes the highlight of the garden. Plant it in a flower bed but it could be useful on its own or with other evergreen, perennial or shrubs in order to make evergreen beds with height differences. Foundation Planting For extra large houses or any other commercial structure, Green Giant Arborvitae can be planted at the base of the building to minimize architectures and provide foliage throughout the year. Due to its tall growing pattern it is best used at both sides of an entrance or around windows.
Conclusion: Consider Green Giant Arborvitae Now for Beautiful, Maintenance-Free Landscape Green Giant Arborvitae is the ideal tree for homeowners and landscaping enthusiasts who seek a fast-growing and sturdy as well as a naturally stunning evergreen. Its ability
. How big does a Green Giant Arborvitae get?
A Green Giant Arborvitae at full maturity is between 40 to 60 feet high and 12 to 18 feet wide, acting as an attractive privacy hedge and windbreak tree.
What are the disadvantages of Green Giant Arborvitae?
Even though Green Giant Arborvitae is rather easy on the maintenance and grows at a rather fast pace, it has its flaws, of course. The tree grows big; therefore, it may not be suitable for the homeowner who has limited space in the compound. However, it can be sensitive to the root rot in difficult to drain soils and this can be toxic in freezing winter climate.
What is the difference between Thuja Green Giant and Green Giant?
It is one and the same—Thuja ‘Green Giant’ is just the scientific name of Green Giant Arborvitae. They are the same tree which grows very quickly and also remain green all the year.
Where is the best place to plant Thuja?
Thuja Green Giant grows best in an environment with full to partial sun and grows in well-draining, fertile soil. Grow the plants in a environment with a minimum of 6 hours’ sun exposure and avoid planting them in places that get waterlogged.
How much does a Green Giant Arborvitae (Thuja ‘Green Giant’) cost?
The cost of Green Giant Arborvitae depends on size and nursery but it, on average, can cost between $250 and $500 if it is a 12-foot tree. Sizes on the small side of the scale, including the 3-4 feet trees, are usually priced between $50 and $100.
What size Green Giant Arborvitae (Thuja ‘Green Giant’) should I buy?
The size you choose will depend on your preferred type of landscaping. In case you want a fast-growing privacy screen several trees that grow taller including those that reach a height of between 6 and 10 feet should be planted. More economical ones comprise of young trees not more than three to four feet in stature which can to full maturity in few years.
What problems are associated with Thuja Green Giant trees?
Thuja Green Giant is nearly pest and disease free, but problems that can occur are bagworms on mature plants, root rot in heavy clay soils, foliage browning from irrigation or lack of water. Most of these can be avoided by proper planting and maintenance.
How much space should I leave between Green Giant Arborvitae?
Customers who want to install Green Giant Arborvitae for privacy screens or hedges will have to plant them 5-6 feet apart to ensure good coverage and proper growth of new branches and leaves above one another. If you are planting as a companion for other main trees, make sure to allow 10 to 15 feet to give the plant ample room to thrive.
How do I care for Green Giant Arborvitae (Thuja ‘Green Giant’)?
For the most part, it is easy to take care of the Green Giant Arborvitae. In the first year water your plant appropriately, and fertilize in the early spring with an appropriate balance fertilizer and a layer of mulch to help with moisture. They also suggested that light pruning can be done to maintain shape.
How fast does Thuja Green Giant grow?
Thuja Green Giant grows very fast, with a growth of 3 to 5 feet within a year ifenvironmental conditions are optimal. This makes it one of the fastest growers of all the evergreen trees available in the market, and ideal for anyone in the process of preparing to create a privacy hedge or simply a windbreak.
The Remarkable History Behind Green Giant Arborvitae: From Denmark to Global Landscaping Fame
The Discovery of Thuja ‘Green Giant’
This tree was first grown in the 1960s using a cross breeding program where other arborvitae forms formed the basis of this variety. It is a product of a plant expedition from the United States of America National Arboretum. This tree was found in Denmark at the Poulsen Nursery and it was cultivated as a part of a cross breeding of ‘Thuja plicata’ the Western Redcedar and ‘Thuja standishii’ the Japanese Arborvitae. This cross resulted in a tree with remarkable characteristics: fast growth, ability to withstand pests, diseases and harsh and varying environments. Soon after this discovery it was grown under different climates as well as in normal condition it is known for growing up to 3-5 feet per year and it is one of the fastest growing tree of evergreens.
Introduction to Landscaping
New to the commercial landscape in 1998, the Green Giant Arborvitae is a rectangular tree that is taller than it is wide. In 1922 the U.S. National Arboretum distributed this tree to nurseries all over America where it grew fast, was very resistant and had a dense crown. As you may have anticipated, landscapers and homeowners took to the Green Giant quickly and primarily for making privacy screens, or windbreaks and large ornamental structures.
Modern Popularity
Today, the Green Giant Arborvitae is one of the favored evergreen trees in North Americas. Due to its ability to grow well in different types of soil and weather and its inherent dislike from deer and pests, it has become a top choice for the production of natural hedges. Such conditions are characteristic of the regions where it is used and is famous for their adaptable and durable tree for current landscapes. Therefore, although Green Giant Arborvitae cannot be associated with historic Egypt, its popularity in the gardens is evidence of how the new techniques in horticulture and nature that have led to great additions to our gardens. This history it shows a mixture of the botanical interest, multilateral collaboration and plant breeding that defines the modern world of landscaping.
Just think of houses painted in white washed losing themselves on rocks, the blue sea beyond the land reaching out to the sky and the evenings painting the sky with shades of orange and pink. This place is Santorini, Greece, or, to speak more precisely, this place is well-known all around the world and has already won the hearts of millions people. No matter whether you want to get a glimpse of what purely actualized luxury looks like or if you are interested in how you might design your landscapes and environments, there is something of contemplative charm, peaceful serenity, and eternal grace about the aesthetics of Santorini. The Allure of Santorini: A Timeless Landscape Outlined in the southern of Aegean sea, Santorini is a member of Cyclades island group and rich in beautiful scenery, including the views of caldera, blue-domed churches, and the architecture of tight streets and staircases. So beyond the most pretty photo backgrounds that we know Santorini for what really blesses the island is its tranquil mood. The first inhabitants settled on the island at least 6,500 years ago; after the volcanic eruption 3,660 years ago it was formed the cliffs that we can admire today. Visitors from around the world are drawn to Santorini for a variety of reasons: It is famed for its natural sceneries, cultures, tourism history, local people’s hospitality and cultures as well. But, more than anything, they visit to admire—how nature and design have been integrated or just to get a few Tips about their personal dwellings in their own country.
Architecture and Landscape: Design and Nature: The Union of TwoConcepts The building design of the island is just as striking as the physical scenery of the island of Santorini. The beautiful whitewashed houses now built into the cliff face perfectly compliment the blue seas and sky that surround it. What is truly remarkable is that in Santornini design and nature complement each other and there is no end to the creative desire for landscaping and designing outdoor spaces. Just think of using features of Santorini Architecture in and around the garden or your outside area. One could think of a mediterranean style garden with white washed stone walls, Lime green bougainvillea, terraces to accommodate afternoon sun bathing. Or you might look at the Scandinavian style of the island – partnership between lines, wood and simplicity with white and blue colors and shades of earth. Exploring the Caldera: A Natural Wonder The focal point of attractiveness of Santorini is the caldera – it is a crater of a volcanic crater that is now an island with a stunning lagoon and vertical coastlines. The best way of viewing the caldera is from a boat where one can view the rocks which make up the caldera, than actually realise the magnitude of the caldera. Here the water is deepest, clearest and it is most tempting for a swim or to sail in luxury. But the caldera is not only an obvious object of natural exploration, it becomes a starting point for creating beautiful and serene water-centric gardens. Such an impression of the color that reflects the water and changes the sky and the quiet sound of waves tapping on the rocks, the feeling of calm which is given by the proximity of water all of these features can be used in the gardens or landscape designs. If possible include a body of water in the garden which may be a pond or a pool; this represents the caldera of the Santorini.
Sunset Splendor: Nature’s Masterpiece Santorini has perhaps the second most famous sunsets after Rio de Janeiro. When the sun begins to set, a beautiful broad spectrum of colors starts to fill the atmosphere, ranging from scarlet to violet and gold. Both tourists and residents of Santorini go to the so-called observing points in various places of the island, although the most well-known is Oia. There is so much of possibilities to bring into your outdoor area elements of Santorini’s sunset. You might select a spot for admiring the sun’s setting or paint the room in colors akin to the sunset or put flowers with sunset colors around the house. Some might wish to have a proper seating area with a view of the horizon or even the smallest reference to the sunset hours in Santorini; what’s important is to capture it in your garden, and you’ll already have your own little slice of magic.
Embrace the Elements: Earth, Water, and Wind Santorini is made of the elements that forms the landscape- the land, water and wind. Volcanic soil supports farmland that nourishes vineyards, sea offers gentle breeze towards the island and due to its geographical location the cliffs help defend against strong winds. All these natural features complement each other to form a balanced surroundings and you can use as a reference when planning your own gardenden. Earth: This island’s composition is quite productive, and even if associated with volcanic activity, it is full of broken stones that allow root penetration. This is very similar and can be done in your garden by using natural stone or volcanic rock within your landscape design plan. Water: Water is endemic to the beauty of the island few places reflect the beauty of water than Santorini. Of course, the sea that surrounds most of the island is typically a shade of deep blue while water is especially incorporated in the designs of the many resorts found on the island. Adding a water component to your garden is very attractive and will bring a dose of tranquility to the area. Wind: The winds of Santorini are part of the island’s beauty , and designing a space that could engage the wind can bring a new dimension into your garden . It could be introduced with the use of tall grasses, wind chimes or plants that move gently to the wind.
The Heart of Santorini: Culture, Wine, and Cuisine So, when you are finished with sightseeing in Santorini, you’ll never be without something to taste or eat. Volcanic soil rich in Greece stretches across the island where some of the country’s premium wines are produced especially the Assyrtiko. A visit to any of the many wineries found in Santorini is not only a great way to sample these great wines but also a chance to appreciate how vine growing is possible in such conditions. It can also create a sensory appeal when matched with kitchen culture of Santorini with your garden design. There is also the option of an increased openness of the house to the yard through a the creation of an outdoor cooking or dining zone. If you were to have some form of an outdoor garden or green house, then rosemary, oregano, or basil plants or a small vine yard would be a great way to bring the gastronomical aspect of santorinian culture into your home.
Santorini Inspires Change: How to Get a Taste of It Santorini is a place that makes you feel – that is until you have feelings of serenity and elation while simply staring at the sea or marvel at the sinking of sun over the caldera or the inspiration one gets exploring these beautiful, picturesque and charming villages. Santorini is a beautiful place, but you don’t have to go there to feel that beauty; you can bring that feel to your home and your garden. Santorini’s smooth and unadorned buildings provide a perfect background for creating a calm, beautiful, and timeless outdoor environment, complemented by the bright statements of flowers in bloom. This way, you can incorporate landscape into a Hawaiian garden that is compliant with earth, water and wind . From visualizing a complete overhaul of the backyard, starting with the construction of a new space specifically for the use as a patio, to getting inspired by two young lovers or experiencing a evoke the Greeks in your landscaping project, Santorini is the inspiration one needs. Seeing the beauty of the island move you to something, make a change today in designing your outside space into a beauty that it deserves.
FAQs: Santorini, Greece
What makes the place Special Santorini Greece? Santorini is special because of its volcanic architecture; stunning caldera vistas; famous white houses with blue domes; beautiful sunsets. The destination also benefits from a history, beautiful sandy beaches and extraordinary local wine Assyrtiko among others. The destination has the factors of natural scenery and historical places, fairly good accommodation facilities, and these qualify island as a great travel destination. This very beautiful island of Santorini, or is it in Italy? It is actually in Greece not Italy as much as you might want to link the two together. It is among the Cyclades islands in the south eastern part of the Aegean sea. Despite the Mediterranean appearance, Santorini is a Greek island with volcanic history and one of a kind architectural design. What is Santorini famous for? Santorini is known for the view of the ocean and the caldera, sunsets, and houses covered with white and with blue domes located on cliffs. It is also famous for its volcano-formed beaches, sophisticated and tourist-class hotels, wine factories, and two archaeological sites of exceptional interest, the volcanic city of Akrotiri, or the ‘Greek Pompeii.’ Is Santorini expensive? Santorini is relatively costly especially during the touristic months ( June to September). Due to this reason, some of the costs such as costs of staying in a luxury hotel, eating in an expensive restaurant, or participating In famous tourist attractions costs more. But of course, there is how to enjoy santorini for less, which is by hiking there during low season and accommodation in small guesthouse, also by eating in local Tavenar.
Booking a hotel in Santorini Greece – What are the top options? As it is with any destination, Santorini has many categories of hotels from the high end hotels to the cheapest hotels. The most popular areas to stay in are: Oia: Oia is charming popular with couples due to the beautiful sunset and there are many five star hotels on the island. Fira: The city standing as the island’s capital with lots of shopping, eating, and clubs for social activities. It also offer immense view of the caldera. Imerovigli: Despite not being as well known as nearby Fira, Imerovigli is also known as the “balcony of the Aegean” and offers a more relaxing especially, luxurious experience. Kamari and Perissa: Tourist resorts on the beach that provide bigger and more budget hotels as a good place for taking a sea-side holiday to. Weather for Santorini Greece – What kind is the climate? This island has a Mediterranean climate with temperatures rising up to the mid-thirties in summer low humidity, and rainy winters. Summer (June to September): Tropical climate characterized by warmth and sunshine with the possibility of dust storm hot temperatures between 25°C and 35°C (77°F – 95°F) perfect for largely engaging in aquatic and outdoor adventures. Spring (April to May) and Fall (October to November): Nice and warm with even lesser travelers with the climate being moderate without the heat at 60 to 75 degree Fahrenheit. Winter (December to March): Slightly cooler with temperatures ranging between 10°C and 15°C or 50°F and 59°F, and sometimes rainy, however there aren’t many visitors and everything is cheaper. Santorini Greece resorts Which are the best resorts in Santorini? Santorini is home to many fabulous resorts many of which offer views of the caldera,jets of water and a level of luxury. Some of the top-rated resorts include: Canaves Oia Hotel Grace Hotel Santorini Katikies Hotel is a Luxury Collection hotel. Perivolas Hotel These are small, luxury hotel resorts which offer excellent services, magnificent scenery and comfortable, and cozy rooms which are perfect for weddings, honeymoon etc.
Where is Santorini Italy? And as much as Your Highness might want Santorini is not in Italy but in Greece.This is mainly blamed for the fact that the area has a Mediterranean like architectural structure and outlook.Santorini is one of the Cyclades islands of Greece located in the Aegean sea that famous for its bizarre volcanic formation whitewashed houses and dramatic sunsets. What country is in Santorini? Santorini is an island in Greece. It is the island within the Cyclades in the southern part of the Aegean Sea and constitutes one of the most popular and beautiful travel destinations in Greece.
With life becoming fast and further complicated every day, the pursuit of making a corner of the world as a sanctuary is significant. There is a perfect fit in Japanese Zen gardens, for their pattern is part of a sparse design, and their philosophical foundation is about serenity. Originally, the gardens cultivated within the frame of gardens for Buddhism are more than a marvelous show of an interesting view, but an important spot for meditating and thinking. Whether you are interested in building a Zen garden in your backyard or you are just a fan of the stunning and meaningful concept of these beautiful Japanese gardens, this article will take you walking throughout the basics of what Zen gardens are all about, their components and how they can be created and added into your homes.
What is a Japanese Zen Garden? A Japanese Zen garden in the form of a Karesansui or a dry landscape garden, is an artifical composition of rocks, water, moss, pruned trees, and plants. The centrepiece, though, is gravel or sand that is spread into patterns that look like waves because of raking. Compared to the conventional garden where elaborate plant and blossoming flowers are utilized, Zen gardens contain symbolic features of nature. All of the components are used with purpose, while the general concept of the environment is simple and balanced. These gardens are heavily associated with Zen Buddhism and the garden is preferably situated in Zen temples. But, because of their relatively simple shape, they would be appropriate for the private residence, courtyard or city landscape. The main goal is to provide a passive wash of positive thoughts, to offer a quiet place to look at the interface between order and chaos within and without – a place of meditation.
Why Build a Zen Garden? Incorporation of the Zen garden has more benefits that are not said in terms of the pleasing looks. Here are a few reasons to build your own: Stress Relief: Their main feature is an emphasis on an environment characterized by calmness and relaxation that will let individuals employ zen to the maximum. That’s why raking gravel into such geometric patterns is also actually a form of meditation. Space for Meditation: For those that meditate or participate in mindfulness a Zen garden can also be used to create the ideal atmosphere for this practice. Minimal Maintenance: In contrast to any ordinary gardens, Zen gardens are very low on water and require almost negligible effort to maintain. There are no many plants in them and no need for pruning or watering quite often which makes them environment friendly. Aesthetically Timeless: A Zen garden can never become old-fashioned as the idea behind it is to bring a bare necessity in a home. It is harmonizes well with a number of architectural themes ranging from the more contemporary styles to the classic styles. Personal Growth: Creating and maintaining a Zen garden, also known as a winding path garden or Japanese stroll garden, is never-ending and all about perfection – or the pursuit of it, anyway, since none of us is perfect. After reading about the why let us move on to the how by analyzing the important components of a Japanese Zen garden.
Key Elements of a Zen Garden
Zen garden making is a process that for the creation of this kind of garden the rules of proportions, horizontality and verticality, and the symbols of stones should be considered. They all have deeper meanings. Here are the essential elements: Gravel or Sand The most endowment of a Zen garden is gravel or sand depending on the designers preference. In raked patterns it depicts water fall, or the wave form on the surface of a water body. Almost every movement and action at the shore is showcased for aesthetic value: the constant raking of the sand mimics a specific path of achieving peace of mind. It is a practice of patience, mindfulness and consequent reflection. Tip for Your Garden: Probably, use of lighter shade of the gravel or sand will allow clearer disparities of the raked lines and the stones. Try out the different designs of the rake in order to make different patterns that describe different kinds of water movement. Rocks In Zens’ gardens stones are arranged as islands, mountains or animals with connotation to overstability and longevity. Their position is important because they are always set an odd number of pieces (three, five, seven and so on) to emphasize the roughness of organic shapes. Main larger rocks create the majority of the image, while retaliary smaller rocks are located around them to maintain the symmetry. Tip for Your Garden: Choose various rocks ranging from small to big and of various texture. Try to position them differently at the beginning in order to determine the best working out as even minor changes of position can drastically alter the atmosphere of the garden.
Moss In the case of the gardens, moss gives the place the feel of being soft, old and still. It is also represents the acceptance of the naturae, as the mosses take time to grow and covers up the materials in an imperfection way without any criticism. In the shaded part of the garden moss is applicable which gives the additional dimension to the garden. This film is beautiful to watch because its green color stands out of sandy and stony colors of the desert. Tip for Your Garden: It depends where you place it, you can in apply moss along rocks or use it in places that are shady most of the times. Make sure to keep the moss damp, as you would when you steam them, which is helpful in dry weather. Pruned Trees and Shrubs The plants placed in Zen gardens are living beings that have carefully groomed look to them to create an appearance of artificiality. These may be Japanese maples, pines, or bamboo etc. They are trained or cut to skinny shapes that are complementary to the general smoothness of the garden. Even the act of pruning is exercise in one’s own self control and awareness, which are attributes of Zen. Tip for Your Garden: Select plants that grow slowly so that you can prune them as often as you wish without hurting them. Trim branches as naturally as possible because this garden seems to have natural forms of wind sculpting. Water Features While old style Zen garden have no water at all, modern versions may include small water designs such as pond, artificially made waterfall or bamboo water pump. Water also has a meaning of water renewal, the state of water flow also helps for the garden to be calm. Tip for Your Garden: This is a great reminder that any home water feature design, no matter how large, can make quite the statement. Just a basic bamboo fountain or a stream of water falling would add the required amount of noise that enhances the experience of a meditative environment.
Bridges and Pathways Transitional objects are familiar to people as bridges and stepping stones which shall be described as the change in conditions, or transition in general. In a traditional Zen garden they urge guests to stroll especially taking time to survey the surroundings. Tip for Your Garden: Planet: Trails have got to be made of natural material, for instance, stones or even timbered bridges. Organise them in such a manner as would require the user to be slower in order for the user to be able to have some time to reflect on a given step.
Step by Step Guide to Constructing Your Own Japanese Zen Garden Only now that you have read throughout the given checklist, you can proceed to design your own Zen Garden. Here’s a step-by-step guide to help you get started: Step 1: Choose the Location Choose the spot in your house that you would wish to have your Zen garden most probably. It could be just a small postage size piece of space in your compound, a courtyard or maybe just a part of the balcony. More importantly ensure that there are no interferences such as noise and other forms of interruption. Step 2: Prepare the Ground They are to free the area from any plant or chaff or any other object. Level it and assess if you want to install a synthetic layer for the plantons if needed. Then fill the space with layer of sand or small stone grills so that there is no gap between the structure and the surface. Step 3: Place the Rocks Stack rocks as key materials of the garden. It is advisable to put the largest stones first and as you approach the center arrange the stones in equal distance from one another. Spend as much time on this step as possible for selecting and placing rocks for this will determine the theme of the entire from the garden. Step 4: Add Moss and Plants After that drift rocks to provide the base and install moss plus pruned plants to subdue the stones’ rigidity. This is especially important if you get the tall ones, as you can put them around the base of rocks or along the edge of a garden for contrast. Step 5: Rake the Gravel or Sand With a rake, make swirl designs in the gravel or sand you have provided. The most familiar outcome is the ripple effect; however, you are free to be creative on the pattern of your choice as others represent waves or ripples. Step 6: Incorporate Optional Features If desired add a small water body or a bridge or WALKWAY which adds complete to the garden. Ideally, these elements should do as little violence to the overriding aesthetic as conceivable while still completing the picture/reminding people what they are consuming.
Conclusion: Embrace the Zen Philosophy It’s and art, and more than a beautiful space and it can also serve as a tool to bring order and peace into your life, a representation of one’s soul, a part of Japanese Zen culture. That is why if you want to have a quiet and private spot for introspection, it is best to design your garden using the four natural elements – rocks, sand or water, and plants. Designing your own Zen garden is in itself a process and makes it possible to gain some experience in patience, measures and moderation. It doesn’t matter if you are putting together a small Zen garden on your desk or a full-blown garden on a large piece of land, the basic rules are the same. Rely upon and participate it as a daily chore—go into your garden to take a break, make a cup of tea, and enjoy its beauty. Now, take action. So, there is no need to wait and start planning your Zen garden, so everyone can have a piece of heaven in their backyard.
FAQs About Japanese Zen Gardens
Why are there Japanese Zen gardens? The main function of a Japanese Zen garden is to offer a calm area where people would go for meditation. The purpose of the Zen gardens is to turn the person into a passive figure who is seeking to find harmony with the surrounding environment and achieve mental pre-eminence. Every flower, every tree, every object in the garden is designed to have a meaning to bring people thought and tranquillity. What are seven principles of Zen garden design? Zen gardens are often built around seven guiding principles derived from Japanese aesthetics and Zen philosophy: Kanso (Simplicity): Nothing in excess and no unnecessary items. Fukinsei (Asymmetry): Flaw as in natural beauty and realistic portrayal. Shibui (Subtle Beauty): Simplicity in appearance; not ostentatious. Yugen (Mystery): Negatives and shadows, half-hidden in jokes, allusions or visual ornaments. Datsuzoku (Freedom from Habit): Act of deviating from the common or the norm. Seijaku (Tranquility): Calmness and stillness. Shizen (Naturalness): Mitigation of control vs . With the free course the environment. What is the most popular Japanese Zen garden? The most well known Zen garden is the Ryoan-ji Temple Zen Garden in Kyoto. Its design is well acknowledged as being nearly-Rockwool, with 15 rocks set in a field of smooth white sand. This rock garden has been developed very simple way and is the depiction of mountains and islands in water. What is the main, primary difference between a Japanese gardens and a Zens gardens? A Japanese garden usually provides beautiful plantings, ponds, bridges, and the other annual change elements, and it seems like the natural scenery. A Zen garden or Karesansui is, therefore, a dry landscape comprising rocks, gravel and sand with lots of symbolism. Both garden types convey the theme of natural unity, but while Traditional Zen garden is somewhat austere and serves strictly for the purpose of meditation.
Japanese Zen garden ideas Small courtyard Zen garden: A small garden enclosure should be used to place some stones, a small layer of gravel and trimmed shrubbery to have a calming zone. Indoor Zen garden: Recycle a dish pan and place sand, rocks and a mini rake to have a small Zen garden. Balcony Zen garden: Use bamboo screens, gravel, a small stone feature to bring some much needed calm to frantic cityscapes. So firstly, what is a Japanese dry garden? Karesansui is a Japanese dry garden that represent landscapes by the use of rocks, gravel, sand and the planting of limited number of plants. It is a garden meant to be observed not walked through and could be islands, a river or ocean without water. What is a Zen garden mini? A mini Zen garden is miniature model of the actual Zen garden and can be kept right on your desktop. They are usually small trays made from plastic material, which contain sand or gravel, small rocks and a mini rake for making troughs. Mini Zen gardens are typical to use as stress-busters, and people can rake them during breaks or at work. How do Japanese people define a rock garden? The Japanese rock garden is another name given to Zen garden where rocks along with gravel represent the islands and water respectively. These gardens are all about intricacies of stones, gravel, and sand to make them depict nature in its simplest and most elegant form as mountains, rivers or the sea. What is Zen garden sand? Sand or gravel in a Zen garden should represent water itself or the current of nature, if translated into words. The sand is well smoothened and always arranged in some patterns of waves, and in a way is used as a chinasha where Buddists sit to ponder and meditate. The actual process of raking is also meditative: this is because that activity is completed so many times in a day.
What is Zen garden gravel? Water or space in a Zen garden is depicted by stones that are literally gravel deposits. It is usually swept into curved lines to create an impression of ripple or wave like movement. The gravel helps to set the scene for the rocks, and plants and other features in the garden and gives it a plain and thus very soothing look. What is the purpose of a Zen garden? The whole intent of constructing a Zen garden is to have a well-ordered scenery that encompass a sense of openness as well as calm reflection. Since undeveloped garden design is easy and does not distract the viewer and oneself, the contemplation of the nature and of the soul contributes to harmony in life.
Just think about being able to pick your salads of lettuce, tomatoes, or herbs anytime from the windowsill right in your kitchen during the winter season. Despite all these, it is possible to grow vegetables indoors provided you follow the following strategies to make your indoor space a veritable vegetable farm. This ultimate indoor vegetable garden guide will guide you from novice to expert – or from the complete basics of growing indoor veggies to what kind of plants will flourish indoors and what conditions they will require. Why Grow Vegetables Indoors? Growing vegetables indoors is highly advantageous in various ways, as are the following. It enables you to be able to get fruits and other perishable items at any point in the year regardless the prevailing weather conditions. Second, it eliminates the need for outside space and can be achieved in any size of house including apartments. Further, soil bourne pests, weeds and harsh weather conditions are elimination since your vegetables are grown under controlled conditions indoors. Now let’s consider the process of creating a productive indoor garden and discuss the answers to some frequently asked questions about growing vegetables at home.
What kinds of garden vegetables can be grown indoors? While not all vegetables can grow well indoors there are so many that can do well in these conditions. Here’s a list of vegetables that grow particularly well indoors: Leafy Greens: Lettuce, spinach and arugula are examples of fast-growing plants which do no necessarily require a lot of light for growth. Herbs: Basil, cilantro, parsley, and thyme have been discovered to be easy to grow even in the windowsill or under artificial lights. Tomatoes: Even such husk variety as cherry tomatoes – will fit the containers well if there is enough light. Peppers: Indeed, like tomatoes, peppers will also grow well in containers placed in adequately lighted areas and warm environment. Radishes: These grow very fast and are not very big. Carrots: It’s better to select small or baby varieties, which require shallow soils for growing. Microgreens: They are rich in nutrients and are suitable to be grown in limited space and they take only few days to grow . Pro Tip: Try to find “dwarf” or “container” sorts of the vegetables you like most because such plants are developed for being grown in limited spaces.
Growing Vegetables at Home using Grow Lights
They are a necessity if your house is located in an area where there is low natural light especially if it’s winter. Here’s how to effectively use them for indoor gardening: Choose the Right Type of Light: Fluorescent Lights: Studies for rather large or bulky types of plants such as greens and herbs. LED Grow Lights: Energy saving and emit full-spectrum light that is natural such that it can be used to grow fruits such as tomatoes and peppers. Positioning the Lights: Position the lights 4–6 inches from your plants and the distance should be maintained as the plants grow. If it is kept too far from the light, the plants become tall and skinny as they grow towards the light source, if it is placed too close the light burns the leaves. Light Duration: The majority of vegetables require a light period of 12 to 16 hours to endorse their growth and development. When making the change, it is important to mark time for purposes of comparison for the two methods. Reflect Light: Put aluminum foil around your plants to make sure the light is focused on your plants uniformly. How to Grow Vegetables Indoors with Grow Lights? Much of the success of indoor gardening relies on the choice of the soil mix to be used. Styling of indoor plants dictates that the growing media should be light, porous to prevent water logging and allow correct aeration of the plants’ roots. Here’s what you should look for: Potting Mix: Ideally, a good potting mix that has been prepared more for container gardening should do well. It is lightweight but it has moisture retaining capacity while having good drainage features. Additives: One should add perlite or vermiculite into the mix if the look and feel of the mix is to be enhanced a little more in terms of aeration. Compost can also contribute to the soils nutrient content. Do not use the garden soil in the yard or outside area for use indoors since they can quickly compact and bring unwanted pest and diseases to your plants.
Which Vegetables Are Best for Cultivation in Apartments?
If you live in a small apartment with not much floor space for pots or with no balcony to place your plants, do not despair, most of the vegetables can be grown in small pots or on window ledges. Here are some of the easiest to start with: Herbs: I also discovered that herbs such as basil, mint and oregano are very suitable to grow in small spaces. Salad Greens: Some of the jewels include lettuce, spinach, arugula highly prolific plants that do not need deep pots. Radishes: These are very small root vegetables and they like shallow pots. Green Onions: their propagation is fairly simple through stem cuttings; it has a continuous bearing habit.
Temperature Control: The Key to Healthy Growth
Temperature changes happen indoors and out, however most vegetable gardening require a temperature of between 65-75°F (18-24°C). For winter season, they should be positioned near the window where there is no draft and the temperatures should not fall during the night. For additional warming, use space heaters of small size and bring optimum conditions if necessary. Most green plants such as lettuce, spinach can endure low temp while plants such as tomatoes, peppers require warm atmosphere. With all those plants, focus on the demand that a specific plant requires for it to grow optimally. Why Not Hydroponics for Faster Indoor Plant Production Hydroponic is another method of growing vegetables indoors; where plants are grown with washing water, rather than soil. This kind of gardening is ideal for indoor use because the systems do not require frequent irrigation, require lesser space, and produce the plants faster than in the soil. It’s especially helpful for produce that grows quickly, such as lettuce, spinach, and herbs. It is possible to buy many small hydroponic kits which can be placed on a counter tops or even a window sill. Furthermore, hydroponics has brought about high risks of pests; therefore it is safer for growing crops indoors.
Indoor Vegetable Garden: How to Grow Vegetables Indoors Easily If you are thinking of establishing an indoor vegetable garden then relax because it is easier than you thought. Follow these simple steps: Choose a Spot: Any good location that offers natural light will do but prefer a location that faces the sun, usually towards the south. However, if the conditions are poor with less light trying to grow, use grow lights. Containers: Where possible, the use of pots with small holes on the bottom to avoid accumulation of water is recommended. It can be done in earthen pots or in lots of containers that can be scooped from yogurt cups to plastic bottles. Soil: They should be planted with a light potting mix media or any other media that is far from compact garden soil. Watering: Adorned inside the house require water but also avoid watering them until the soil is soggy. H2O when the surface layer looks & feels dry at least an inch down. Fertilizing: Take a balanced fertilizer every few weeks in order to supply your plant with all the nutrients it requires for growth.
Growing Vegetables Indoors for Beginners Growing vegetables indoor is a hobby that can be undertaken by anyone as a beginner’s guide to gardening. If you are to start a garden then start with ease and start planting herbs, salad and planting radish. It is very fast-growing and practically demands no maintenance. Here’s a beginner’s checklist for indoor gardening: From the tiniest pots with a few herbs to the chaos of eclectica. If necessary, utilize a basic grow light solution and arrangement. Water often but do not allow the earth to become watery. Be patient! It can take some plants time to get off the ground and therefore, may require the user’s patience to grow well.
How to Grow Vegetables Indoors Without Sunlight
If you are unable to provide natural light then grow lights will be your new best friend. Traditional LED grow lights offer all the required bands of light, necessary for plant photosynthesis. Place them near the plants and give the plants at least 12 hours of light every day. There are plants that thrive in very little light and include plants such a mushrooms and microgreens. Vegetables You Can Grow In Wintering Under Controlled Environment Indoor gardening enables you take fresh vegetables all through the year regardless of the harsh weather. Here are some cold-hardy vegetables you can grow indoors: Kale: It is a cool weather crop that can be grown inside the house. Spinach: Spinach: Spinach thrives indoors all winter and only requires moderate light to grow very fast. Carrots: The small varieties can be planted and grown all through the year indoors in containers. Garlic Greens: If you plant garlic cloves in the soil, you will be trimming fresh garlic greens all through winter.
Indoor vegetables garden and lamps. One of the best additions for people serious about maintaining their indoor garden all year it is the grow lights. They enable you to elongate the growing period so that your vegetables are exposed to the right amount of light no matter the prevailing weather. Lighting height should be changed alongside plant growth and light should be provided at fixed intervals during the day.
Vegetables You Can Grow Inside an Apartment You do not have to let this stop you from farming if you are living in an apartment. In this case you will realize with a few pots and the right setting you can grow so many vegetables indoors. Select small plants with rapid growth such as herbs, salad, and most micro greens to use as listed criteria. Stacking systems or hanging baskets are other options that will ensure that you make a vertical impression from your plants. Best Vegetables to Grow Indoors Under Lights Some vegetables, in particular, do very well under grow lights. Here’s a list of the best candidates: Lettuce: Associated with high light intensities and highly reusable as well as multiple harvest yields. Tomatoes: Dwarf varieties are best grown under grow lamps, especially the LEDs. Peppers: Much like the tomato plant, peppers require a great deal of light in order to set fruit. Herbs: Two herbs that grow well under artificial light are basil, parsley and cilantro. Vegetables You Can Grow At Home
Fastest Growing Vegetables Indoors If you’re eager to start harvesting your indoor garden, choose fast-growing vegetables like: Radishes: Sites ready within 25 days and which is ready for harvest. Lettuce: It takes approximately 1 month to harvest this crop.’ Microgreens: These small but nutritionally rich plants can be cut for reuse after only a week and a half to two weeks. Spinach: A spinach type green that matures quickly, in about 4-6 weeks.
Additional Tips: Watering: Avoid water logging to prevent root rot, water your plants when the soil feels dry. Humidity: Ensure good humidity the tropical vegetable like peppers should be grown under moderate humidity condition. Fertilization: Applying an equal opportunity fertilizer is advisable on monthly basis for the plant to grow to its optimal size.
This table provides a quick reference for indoor vegetable gardening success, taking into account the season, time to maturity, lighting, temperature, and additional care tips.
Conclusion: Start Your Indoor Vegetable Garden Today! To get you started with the plans of having indoor vegetables today, the following tips should help you. Vegetable growing at home could be a demanding but fascinating activity which enables its producer to have fresh vegetables all through the year. Whether you are constrained to small space by living in an apartment, or just want to garden during winter, this guide gives you all the basics. Finding good vegetables, grow light, and the right soil to transplant your indoor vegetables garden is however easy. Now we are ready to get our hands dirty, take our pots and plant! And the satisfaction of collecting your home grown vegetables is just a few weeks away.
Gardens are not merely plotted designs of plants; they include centers of refuge and imagination, and cultural assets. There are incredible gardens across the world, nature has played its role and people have always embraced this beauty. The garden contains a traditional aesthetic and natural work, ranging from historical gardens of magnificent architecture to the modern miracles, in which each has a particular atmosphere.
Regardless if you are the occasional traveler, the next trip planner or an individual who wants to add beauty to your own back yard, walking through these beautiful famous gardens will only encourage the gardener within. It’s time to travel in seven continents to explore 10 extraordinary gardens around the world -each one calling you to not only appreciate its uniqueness but to make your own special place.
Keukenhof Netherlands It literally called the Garden of Europe, Keukenhof now occupies one of the highest status to be one of the worlds seven most visited floral spot and at the same time, the largest. Also known as the Garden of Europe, Keukenhof is situated in Lisse, NL and occupies a total area of 322,450 m ^{2} ; however, its flowers bloom only in April. Over 7 million flower bulbs burst into splendor, among which tulips, daffodils, hyacinths and other bulbs that bloom in spring. Visiting Keukenhof Park resembles strolling in the art exhibition since various colours invade the site from horizon to horizon. Tulip garden is accessible only between March and May which again are perfect timing for a visit because of tulips. If you fancy flowers or bright gardens in particular, Keukenorf is definitely going to take your breath away. Takeaway: If you, for instance, imagine grand color and flowers or large multi-colored flowers, you may want to go Keukenhof-way on your garden by planting bulbs for Spring blooms.
Kew Gardens, England Kew Gardens which is situated in London can be named not only one of the most popular gardens globally but also a World Heritage site. This garden occupies more than 300 acres of area and contains the world’s largest live plant collection. Many of these are in the extraordinary glass structures providing tropical and temperate environments including the Palm House and the Temperate House, where there is a magnificent array of exotic plants. The gardens are a research and conservation facility that goes well beyond what most people expect of a tourist attraction. If you are interested in seeing plants that are the only ones in existence or if you are an environmental conservation enthusiast then Kew is a catch-all for both the aesthetic and informative in one package. Takeaway: Kew Gardens is an inspiration for those interested in biodiversity and rare plants, to work towards creating an diverse, natural garden.
Gardens of Versailles, France:
A masterpiece of official garden and of neatness, in the gardens of the Villa Demidoff at Florence. We associate the Gardens of Versailles with elegance and elegant design and distinctive taste of Versailles. These are located in Versailles and were established in the 17th century by king Louis XIV as compliment to palace of Versailles impressiveness. Measuring about 1,977 acres, gardens are classified in the French formal garden type where symmetry, geometrical shapes and water body in fountains are integral features. Enjoy a walk in the park taking a tour past magnificent grass embankments and while at it, people can find sculptures and fountains located all over the park while coming face to face with gigantic musical fountains during summer. It’s the final abode of individuals who have artistic interest in historic gardening and geometric planning of gardens. Takeaway: If you are drawn to the regimented designs of the early twentieth-century formal garden – then it does not get much better than symmetry, neat hedges and water – consider invigorating your garden with these delightful features.
Butchart Gardens, Canada: A Floral Wonderland Butchart Gardens is situated in British Columbia, it was created by one woman who loved gardening. Butchart, Jennie Butchart, turned a limestone quarry into a floral spectacular in the early part of the twentieth century. Nowadays it spreads over 55 hectares and also has a large number of different thematic gardens some of which are a Japanese garden, a rose garden, a Mediterranean garden. It is therefore unique in that even through the year there are new displays for tourists to appreciate when they visit the place. If it is the summer hues of spring and summer, the holiday lights this winter, Butchart Gardens always have something special to offer. Takeaway: People often believe that certain territories could not be of any use: for instance, old quarries are hardly helpful for anything, but with some imagination, they canturn into green oases. Read the chapters from Butchart and try to learn from the experience of her transforming the unused territories of her yard into something magical.
Shinjuku Gyoen, Japan: A Blend of Cultures For this Shinnjuweka Gyoen National Garden in Tokyo incorporates Japanese forest, French formal garden, and English landscape styles. Historically, the land which is home to Shinjuku Gyoen was an imperial garden, but now it is an open park helping people to flee from the city’s frantic pace. The most popular time for visiting is spring when the locals and foreign tourists go to admire the sakura trees and their beautiful flowers – cherries. Gentle water fountains, small beautiful bridges and trimmed trees make the garden a perfect place to sit down and contemplate. Congruently, it becomes an appropriate place for those who want to find silence amidst large city bustle. Takeaway: For people who love the tranquility of the Japanese style in garden design, some of the idea to put in the garden are water fixtures, structured stone pathways and trees in specific areas of the garden area.
Boboli Gardens, Italy: Renaissance Grandeur The Boboli Garden, at the back of the Pitti Palace in Florence, is an entry site of the High Renaissance landscape architecture. It was set up in the 16th century and it set standards of many a European royal garden. There are large smooth surfaced lawns, fountains, sculptures and rockeries all in perfect harmony as part of their natural environment – Boboli. Visiting Boboli Gardens makes you feel you are part of history with the flair of arts and intriguing beauty of nature found all over the garden. The gardens are stunning, it’s really great place to look over Florence, and for those who like arts and natural sceneries. Takeaway: Gardening inspired with ideas from the Renaissance can make your home look beautifully classic. Think about presenting the sculpture, the terraces or small fountains to add more historical appearance to your garden area.
Ryoan-ji, Japan: Zen and Minimalism It is praiseworthy that one of the most renowned examples of the rock garden is situated in Kyoto’s Ryoan-ji Temple. Ryoan-ji garden, however, is dry landscape or karesansui where gravel and stones are arranged and are believed to represent mountains and rivers respectively. This simple garden is best suited for contemplating and for meditation. It is one of the best examples of where they say that the simple things are capable of having the most astounding beauty. For all the lovers to spiritual silence, at Ryoan-ji it is possible to trace the impact of laconism as a principle of gardening. Takeaway: Simplicity can be stunning. For people with less interest in gardening, try to design your garden as the Zen garden containing rocks, sand, and less plants.
Claude Monet’s Garden France: A Painter’s Paradise Of course, it is just one of the photos that the French painter Claude Monet took as the subject of an Impressionist painting of his garden in Giverny. This was garden that Monet took time to develop and cultivate and water lilies became the focus of many of his paintings and particularly the Water Lilies series. More realistic structures in the garden will include; natural lily pond, Japanese bridges, flower beds which forms an art mimicry of the Monet painting. Monet’s garden is similar to one of his paintings so to walk through it is no different from walking through a painting to see light and colors from yet another angle. It is a place that one would love to visit even for art tourists and also the nature lovers. Takeaway: If you love art, do not let your garden be a dead space; paint it instead. Design colors, textures and water elements that depict the arts to make a room that represents the artist.
Villa d’Este, Italy: A Garden of Fountains Tivoli is home to Villa d ‘Este — a garden of water; a green, riotous display of water features. It was constructed in renaissance period and is renowned for stunning fountains which have been designed and located accurately within the garden setting. Fountains are spread across the gardens and make a pleasant sound of water combined with a cool temperature which is needed in Italy during summer. The most famous is the “Fountain of the Organ” but there are over five hundred of them at Villa d’Este, demonstrating what can be created with water in the garden. It is tailored for people who like waters but they prefer them in an open space. Takeaway: Without a doubt water elements are capable of adding the much-needed ambiance to any garden. You had better elevate the watering system to build up the ambience of a water garden, whether you are going to create a water fountain or pen or a small water garden.
Kirstenbosch National Botanical Garden of South Africa: It is a world famous botanical garden located in near Cape Town and stands as the garden that plays Nine significant role of displaying various types of plants in South Africa. It lies at the south-eastern side of cape town at the foot of Table Mountain, it is split into two sections covering an area of 1 300 acres of land and hosts many South African plant. Kirstenbosch is one of those places that is of big interest to botanists, ornithologists and other lovers of the nature as there are many walking paths, thematic gardens and the splendid view of the country landscape. The film can be easily considered as an effective appeal to save biodiverse of South Africa and as an outstanding example of how plant diversity can be focalized. Takeaway: For those who love plants it is good to have plants in the natural environments kind so as to enhance the biological diversity.
These famous gardens give you a look of how you can never run out of ideas when designing your garden. Whether they make you think about the Palace of Versailles or a bare Japanese garden, there’s something or the other that one can learn from these extraordinary places. So why not take action and try to create some of the magic of those gardens for yourself right at your own home? beginner or aspiring gardener – start your journey from the basic or go for a high level or grand gardening, the world of gardening is vast and welcomes everyone.
Who is the largest garden in the world? For more than 72,000 sqm of coverage on flowers, the award-winning Dubai Miracle Garden of United Arab Emirate is the largest natural flower garden globally with over fifty million blossoms. Who is the owner of the most famous garden in the world? The French Garden called the Gardens of Versailles DER is widely regarded as the most famous garden in the world because of their historical and aesthetically lifted up and formality cultural difference. Which country boasts of the best gardens in the world? Japan, England and France are amongst countries with some of the most beautiful gardens; each country has its own characteristics, from strictly minimalist oriental to maximally ornate European. Where is the nicest garden? Tulip gardens: Keukenhof in the Netherlands is one of the most beautiful gardens in the world, solely for its famous spring tulip which gives a very aesthetically stunning environment. What country is most associated with gardening? It was always ideal to predict that England would be a gardening center, with Kew Gardens and the English cottage gardens that provide a focus to the country’s passion for gardening.
Which country has the most beautiful garden? Japanese gardens are famous all around the world and some of the most favorite locations of tourists are Shinjuku Gyoen and Ryoan-ji gardens that offer highly meditative landscape gardens. Do you know where the largest garden in the world is situated? The Dubai Miracle Garden, is one of the largest gardens in the world, with the flowers so magnificent and beautifully arranged in an area of considerable size. Which country has the biggest garden? Dubai Miracle Garden in United Arab Emirates is the biggest natural garden featuring flowers with various stunning floral designs. Which is the first garden city of the world? The Letchworth Garden City in Hertfordshire, England is acclaimed as the world’s first garden city which was designated in the early part of twentieth century, being prophetic in its approach to use garden as model of planning for civilization.
Visitor Tips Keukenhof, Netherlands: Best Time to Visit: mid March to mid May, to witness the full bloom of tulips, is in the third week of April. Nearby Attractions: Leiden, during its historical sightseeing, Amsterdam, and the Dutch Tulip Fields near Lisse. Kew Gardens, England: Best Time to Visit: Perpetual, but flowering is excellent in the spring and summer seasons. Nearby Attractions: in the Richmond Park, the Royal Botanic Gardens Library and Hampton Court Palace. Gardens of Versailles, France: Best Time to Visit: from April to October, with fountain show during the summer weekend only. Nearby Attractions: Versailles, Trianon and salle à manger du niveau inférieur à miroirs. Butchart Gardens, Canada: Best Time to Visit: Summer for flowers; winter for the Christmas lights. Nearby Attractions: The Butterfly Gardens, Inner Harbour Victoria, and Whales Watching Trips. .Shinjuku Gyoen, Japan: Best Time to Visit: Flowers of cherry trees bloom in mid March to mid April and autumn colors at the latter half of November. Nearby Attractions: A number of attractive places include the Meiji Shrine, the Tokyo Metropolitan Building, the Shinjuku – the place of trading and buying. Boboli Gardens, Italy: Best Time to Visit: Spring and autumn it’s not extremely hot and not very crowded with tourists as a rule. Nearby Attractions: Art gallery Pitti and the Royal Dick Palace in Florence, gallery of fine arts, Galleria dell’Accademia and the Basilica Church of Santa Croce. Ryoan-ji, Japan: Best Time to Visit: It is always possible to drive to the coastal area at any one time although a morning walk would require spring or autumn weather. Nearby Attractions: Tourist attractions found in Kyoto are Kinkaku-ji, Daidokuji, Nijo Castle and Kyoto Imperial Palace. Claude Monet’s Garden, France: Best Time to Visit: This is mostly available from April to October, while during the water lilies blooming periods of July to August. Nearby Attractions: Inpression, the Sun, the Sisley. Villa d’Este, Italy: Best Time to Visit: May through to October, though, if you are interested in seeing many fountains and beautiful gardens. Nearby Attractions: A Residential Building with Baths, Villa Tivoli Old Village and Villa Gregoriana Gardens Park. Kirstenbosch Garden, South Africa: Best Time to Visit: To view South Africa’s beautiful spring flowers which are in season between February to May.Nearby Attractions: Table Mountain National Park, Constantia Wine Route, and the Cape Town City Centre.
Traveler’s Stories or Quotations Keukenhof, Netherlands: Fun Fact: Keukenhof was actually a hunting pavilion kitchen garden for the countess castle, where flowers, herbs and vegetables used in countess’ kitchen were cultivated. Kew Gardens, England: Traveler Quote: Al exceeding, getting a tour of Kew’s Palm House felt like a detour to the tropics. In essence, it’s a combination of the natural world and archaeology.” Gardens of Versailles, France: Fun Fact: It took almost 40 years to finish and 6 million trees, plants and flowers were planted on the site. Butchart Gardens, Canada: Traveler Quote: Indeed there are certain areas and corners which seem to be in a different world once you are in the garden. What has taken place here is quite literally turning the site from being a hollowed out quarry to a beautiful garden!” Shinjuku Gyoen, Japan: Fun Fact: Formerly, this park was a royal property and at present it has become a national park in Shinjuku City. Boboli Gardens, Italy: Fun Fact: These gardens were used as a model for most other European gardens and of Versailles too. Ryoan-ji, Japan: Traveler Quote: In fact, Ryoan-ji is not simply a garden; it is what no other is. Amazingly basic, yet folks can’t help but be engrossed in what the painting is and wonder about the core of naturality. Claude Monet’s Garden, France: Fun Fact: Amazingly, Monet planned out the garden himself and the majority of his best-known paintings were painted with this garden in mind, some of them depicting the “Water Lilies” series. Villa d’Este, Italy: Fun Fact: over five hundred fountains many of them work only with the help of gravity and hydraulics, the unique invention of the Renaissance. Kirstenbosch Garden, South Africa: Traveler Quote: The view over Table Mountain from Kirstenbosch is superb. The garden seems rather like a sanctuary of life and color at first.”
Environmental Conservation and Management Kew Gardens, England: The Royal Botanic Gardens, Kew is at the forefront in plant science and plant conservation being involved in international research on conservation of threatened plant species as well as augmenting visitor’s understanding about environmental issues. Butchart Gardens, Canada: The gardens incorporate environmental management where the tropical gardens has implemented water recycling, composting and organic fertilization hence has most of the gardens evergreen. Kirstenbosch National Botanical Garden South Africa: Kirstenbosch is a Botanical garden that is specifically established to preserve the natural habitat of South Africa plant species the garden situated in the Cape Floristic Region a World Heritage Site.